ir a principal |
Ir a lateral
I heard a lot about this product before I bought it and to be honest I was put off buying it for a long time by the price. It has been around for quite some time but recently I decided to take a look on Ebay to see if anybody was selling it at a reasonable price because £15 to £18 for an eye primer is beyond ridiculous. I was thrilled to find a seller who was selling the 10ml bottles for just £9. I read many reviews beforehand also and many people said they loved this product so I figured I would give it a try.If you do not know, Urban Decay Primer Potion is a cream that you blend over your eyelids before adding eye shadow. It claims to stop eye shadow from creasing and fading. I have now tried this product five or six times and the majority of those times were on nights out or a long days at university. I also wore it for cheer and dance practices to really test its strength.
Packaging:As you can see in the photo below, it comes in a purple curvy genie shaped bottle. The packaging itself is very cute but it's not practical at all. Once you've used half of this bottle you will need to cut the packaging and de-pot the product (put it into a sample jar) in order to be able to carry on using it and that's really crappy. This is because of the shape of the bottle, the fact that there's no room for the wand to twist around to pick up product and because the wand only reaches a certain point in the bottle due to its length. At first you're led to believe you have run out of product but in fact there's probably two whole month's worth of it still stuck to the sides of the bottle! I won't enjoy doing this eventually because I don't really want to damage my packaging because I paid for it. I think Urban Decay really need to sort that one out. 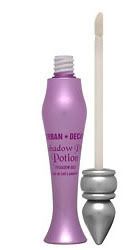 In the meantime you can find a great tutorial on how to de-pot your UDPP here:Clumps of MascaraI also actually e-mailed UD to complain about the packaging and they told me they were working on new packaging and appreciated my feedback but were unwilling to offer me any compensation for any product that went to waste because of their packaging. Think what you will of that.
TextureSmooth, creamy texture. Blends over the eyelids beautifully. I read reviews that this was 'drying' but it isn't drying at all. It's so smooth and soft. I love the way it feels and goes on. I really wish they could make liquid eye shadows like this because it just goes on so wonderfully.
ScentThis product has no scentPerformanceAs I stated above I wore this under my shadow during either a night out, long day at uni or my cheer/dance practices to REALLY test its power. When I am at practices I jump, dance and get really hot and sweaty. What I found was it did prevent creasing but it didn't prevent fading when worn on its own without any kind of cream shadow over the top. That was disappointing. I would recommend wearing this and then applying a cream shadow over the top to give your shadow extra staying power. Otherwise you'll find your shadow will only last about 6 to 8 hours before it starts to fade. When worn with a cream shadow your eye shadow will last all day and at least half, if not all of the night! Mine went on all day and all night but it depends on your skin type as to how makeup will work on you.So would I purchase this product again? If the packaging were better (say in a tube), I would definitely. It's awesome. Every eye shadow I had that would crease up on me no longer does. I love it and I wish I'd tried it sooner. I think I'll just wait until they re-design the packaging and make do until then. I really don't want the hassle of cutting up a bottle and de-potting product everytime I need a new bottle of this stuff. My advice is not to buy it in department stores because they'll charge you the earth for it. Look on Ebay instead.
I wanted to write this entry because for me personally having good quality make up at a good price is important. I think a lot of make up (including that sold in drugstores and department stores) is overpriced. It's usually only by a slight amount in drugstores but department store brands like MAC and Estee Lauder are horrendously overly expensive. £10 per Mono Eye Shadow is beyond awful in my opinion no matter how great the quality is.
There are some obvious ways of getting cheaper make up and I will cover those in this entry but I will also offer alternative ways to get big brands at a good price in places I think most people would not normally think to go to.
Option One: Buy Online

Ebay
Ebay is your best bet for finding cheaper make up online. All brands can be found on this website too. There are a number of things to look out for though.
1) Watch Those Sellers!
DON'T ever buy from any seller who has less than about 95% positive feedback. When a seller's rating is this high it means buyers very very very rarely have problems with them. The small percentage that's left usually means when they do have problems they're usually settled fairly and this makes them safer to buy from and more reliable sellers. Of course there are always exceptions, I wouldn't be wise if I didn't point this out but I have been buying from Ebay for years now and I've followed this rule and had no problems this far. It might sound obvious but be sure to give sellers who offer products at a lower price with lower p+p your attention! Screw the ones who charge you more! Let them miss out on your cash :) You'll be surprised how some people will simply buy an item because it's there and who don't thoroughly check seller prices.
2) Tick all the right boxes!
Ebay have boxes you can check to set your preferences on the left hand side of the site. I recommend ticking 'My Country Only' (in my case this would be 'UK only'), 'P+P Lowest First' and then if you are like me and want to purchase the item quickly, go with 'Buy It Now' too. Personally I have NO patience for bidding. I NEVER go to ebay to bid. If I see an item, I want it right away. I do not want to have to wait it out. Checking 'P+P Lowest First' obviously promises you won't be paying a ridiculous amount of money for shipping. Checking 'My Country Only' means your postage is reduced because it's in your state and not abroad and 'Buy it Now' means you'll get the item bought and delivered faster.
3) Sift Through!
Once you have found the product you want make sure you check out the competition. Checking 'Lowest First' will help you see the prices but delivery options vary from seller to seller so two sellers may have the same price on an item's delivery but one of those seller's delivery options may be faster despite being the same price as the other. This is why it's important to look around!
Option 2 - High Street - Drugstores


Okay so sometimes we don't always have the time to wait for items to be delivered. Also for some people it also gives peace of mind knowing that there's next to no risk that an item has been tampered with and buying from the high street is your best bet to find items in perfect condition. Plus you can see the item right away and feel it/test it out, etc. You can't do this with online shopping. Although what I usually do when buying makeup is look for the product in the shops to swatch it and then look online for it later so I know what the product is like before I buy online. Obviously you can't always do this but it works for the most part.
The trick is to shop around. Again, it seems obvious but you'll be surprised how many people fail to do this! Seriously. Don't just buy from a shop because it saves you having to walk to another to find it. You may seriously be missing out!
My favourite high street shops to buy make up from are Boots and Superdrug. They sell the same brands of make up but Superdrug offer a 10% student discount when you spend £10 and they regularly have buy one get one frees/3 for 2 offers. Boots do 3 for 2 most of the time and give you a No7/Ruby Millie voucher per £5 that you spend. They also give you points on your advantage card which you can later save up and use to buy other things.
So you see both shops have their advantages but it's important to go to more than one place that sells the same items just to be sure. You never know if the other store is holding an offer on the same item and surely it's worth walking five minutes to save yourself the extra money!
Also - HAVE PATIENCE! IF you aren't desperate for the item, WAIT IT OUT. I promise you from experience that the item you're after will come down in price at some point when they make room for new stock or when they need to shift stock between seasons. Keep a sharp eye out in between seasons for cheaper make up because it DOES happen.
Option 3 - Clothing Stores
Believe it or not, clothing stores are catching on. They're beginning to realise when women go to buy an outfit they often then go on to look for cosmetics.
It is VERY useful to keep your eyes open when you're shopping for clothes. Especially on the individual mini stands that they dart around the store. This is where you'll find some great deals.
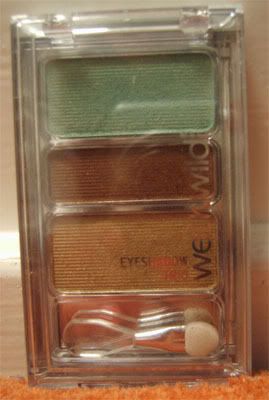
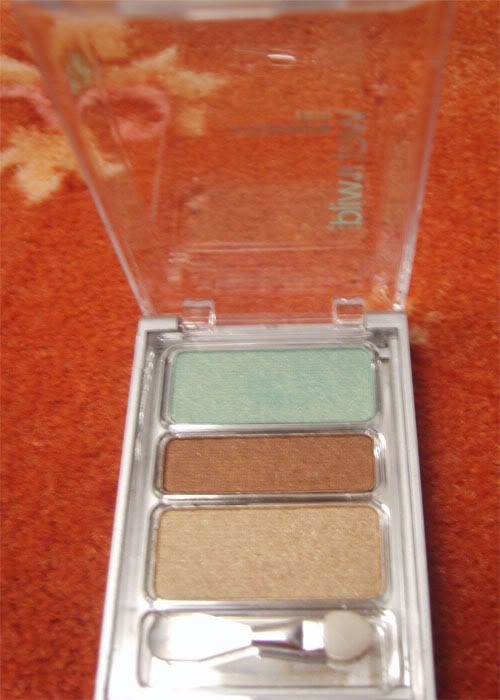
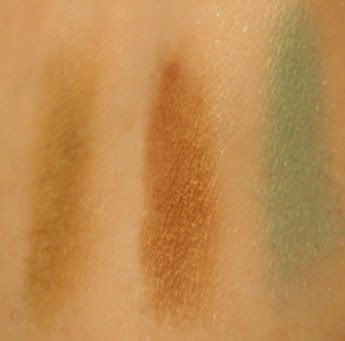
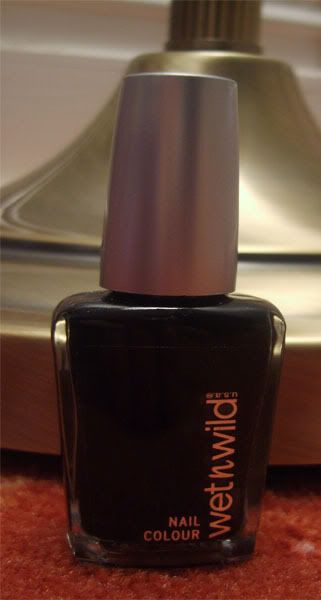
I recently bought a highly pigmented Wet And Wild eye shadow trio at New Look for £1.50. Where were they? Right next to the cash points where everyone usually just passes by. Normally it costs £3.50. They are also selling Eyebrow grooming shadows/kits, false nails, nail polish and false eye lashes. None of these items exceed £5 so you can grab a complete bargain.
Keep your eyes open! These shadows I bought are on the same level as MAC in my opinion and they cost me £9 less! All because I kept an eye out.
Option 4 - Markets
I wanted an individual section for markets because not many people realise that
you can find some really awesome deals.
Every single city has a market. Usually these are the places where they sell fruit/veg, meat, clothing, make up and candy at different stalls all under one roof.
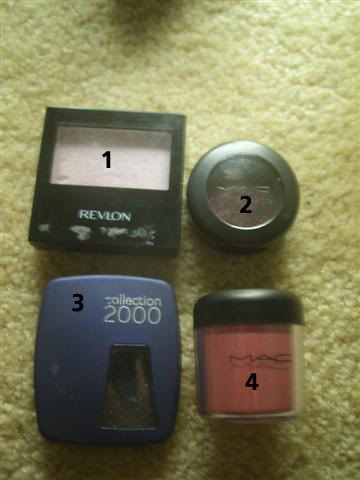
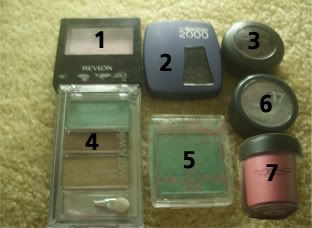
Mine has a small makeup section where you can buy loads of cheap make up. Some of it is a bit cheap and crappy in all honesty but recently they were selling older revlon, maybelline and collection 2000 mono, trio and quad shadows for between 35p and £1.45 each. It was crazy cheap and I got an excellent highlighting shadow and some coloured mono shadows and I paid barely £1 for three. Also they stock beautyUK quad eye shadows (very well pigmented and very soft) for 10p cheaper than in Superdrug. £2.89 at my local market, £2.99 in Superdrug. It might only be 10p but if it's the same product, why bother paying more? It's so worth going to these places and just taking a look.
Option 5 - Drugstore Brands
Okay so finally I'm going to go over drugstore brands. Brands like Collection 2000, Miss Sporty, BeautyUK, Maybelline, Rimmel, Revlon and thousands more.
Do your shopping. Compare products from each brand. Take swatches to compare quality! Don't be afraid of doing this. They put testers out so you can see what the product looks like, smells like and feels like. So do it. It's no use complaining the colour pay-off of a shadow is crappy if you didn't swatch the tester in the store to find that out before you bought it. If there isn't a tester out you have every single right to ask for one. It's a store's job to provide them!
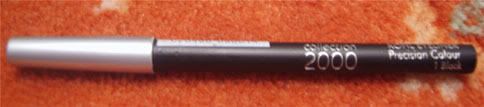
Don't hold prejudices against cheaper brands by believing their stuff must be crappy. Collection 2000 is the second cheapest drugstore brand (next to Miss Sporty) and their liquid eye liner has won an award for being the best long lasting liquid liner compared to other drugstore brands. Through personal use of this liner I can tell you it's damn true. It lasted longer than my No7. No7 liquid liner costs £8.50. Collection 2000 liner costs £1.99. It should be more expensive in my opinion but don't tell them that ;)
Option 6 - Friends and Family
It's worth asking around your own circle of friends and family if they have any make up items they don't use. Let's face it, we all have a lipstick or eye shadow we bought on a whim even though it doesn't suit us. So why not trade ununsed items? You'll most likely get it free from your nearest and dearest too. A good time to ask is after Christmas because this is when most people receive unwanted items or buy items they later regret buying.
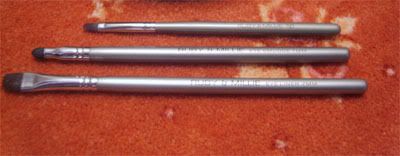
I already own three other Ms Makeup brushes and I had no idea that they also had this blending brush until I visited Boots' larger department store and saw it there.
Since I was aware of the quality of these brushes of course I snapped it right up.
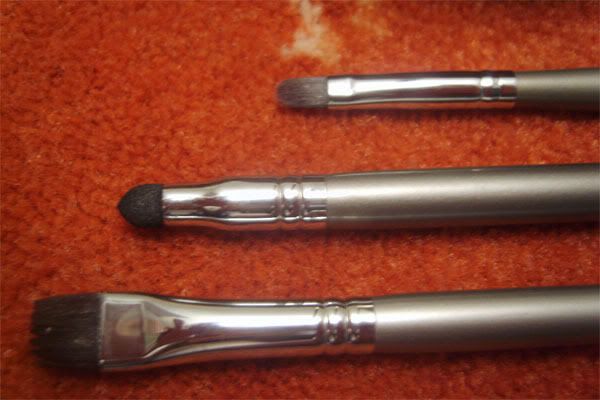
Ms Makeup Eye Blending Brush
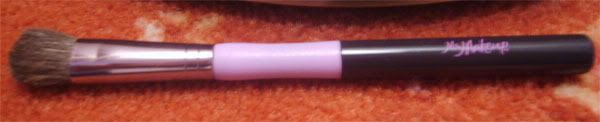
Price:
Approximately £4 and can be purchased from Boots drugstore.
Feel:
The bristles are REALLY soft! They feel silky smooth :)
Blending Performance:
Blends beautifully. Because this is a huge fluffy blending brush I find it's particularly ideal for applying eye shadow as a highlight to the brow bone since it blends it out so well. It can also be used to apply shadow but be careful because with the size of the brush it might send your shadow all over the place.n It's fairly compact too (which means the bristles are glued in quite well to the brush handle).
Bristle Fall-Out:
I got some bristles falling out the first time I washed this brush which was disappointing but since then I haven't noticed anymore falling out.
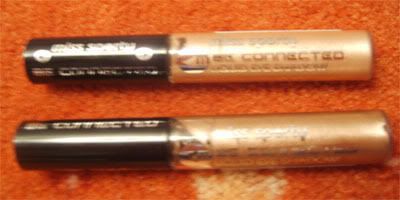
Miss Sporty just released their 'Be Connected' range. They consist of (24ml) mini liquid eye shadows and lipglosses. They cost £.199 per end and you can click the eye shadows together with the lipglosses. This is very handy for popping into your handbag as it saves space by having two items in one stick instead of two in this case. I didn't need anymore lipglosses so I went for two of the liquid eye shadows instead. (However you can't click two eye shadows together)
You can find Miss Sporty products here:
http://www.miss-sporty.co.uk
They claim to last up to 10 hours and also claim to be crease resistent.
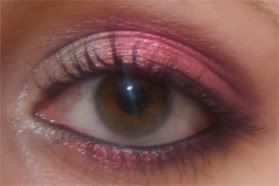
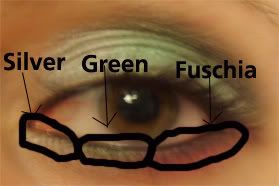
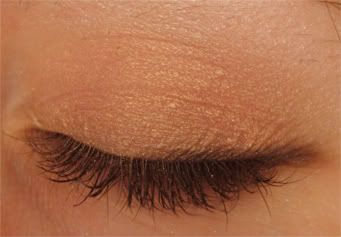
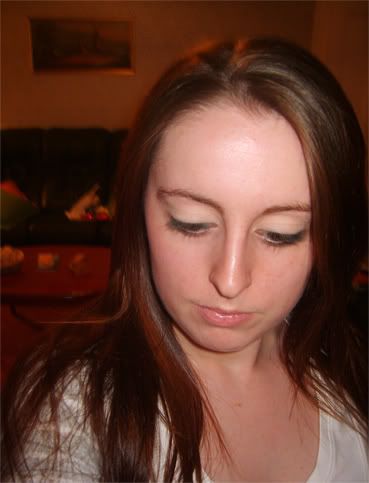
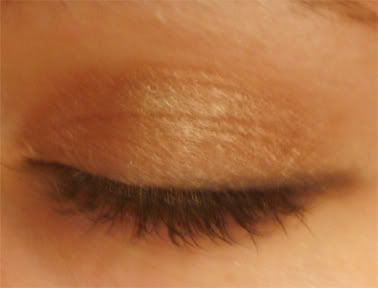
Top to Bottom:
'Sublime'
'Allure'
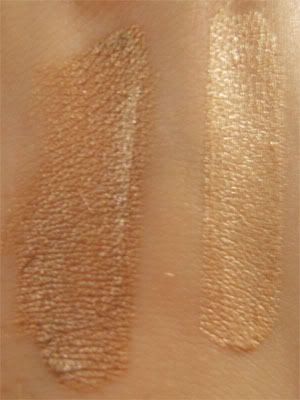
Swatches
Left: 'Allure'
Right: 'Sublime'
Texture:
The texture is as expected for liquid shadows. Almost like a thin-ish mixing medium (think a thin-ish liquid foundation kind of texture) feel to them. Applying them with the wand is best as using your finger causes bad colour pay-off.
Pigmentation(Colour Pay-Off):
Really good. If you use your finger to apply these shadows you'll have to work a little to get the colour to show up but if you use the wand you'll find it shows up immediately and strongly. A very compact brush (a concealer brush for example) is okay at applying these shadows.
Scent:
The shadows have no scent
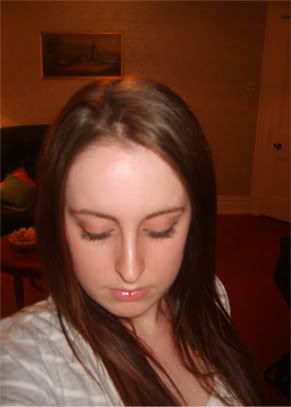
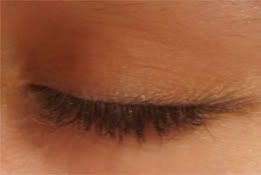
Lasting Power:
I put these on in the morning before I went to uni and they went on smoothly and had no creasing. The colour lasted all day and the shadow itself stayed put all day. However, they did crease up on me almost immediately after drying. This may have had something to do with the base I used (I used a cream base each time) so I will try them with UDPP (Urban Decay Primer Potion) in the near future and update this section to see how they worked out with that. This was the only disappointing element to these shadows.
Blendability:
You can blend powdered shadows around these and over the top fairly easily but because they are liquid shadows they don't work as well for blending as powdered shadows. The shadow will dry up and stick to the skin and once it has dried you can only remove it and not really move it around.
Removing:
I take off my makeup using baby wipes with a little baby oil on them and these came off in one or two quick swipes :)
I have only become a fan of No7 makeup within the couple of months or so. Before then I'd never really tried any of it except for their liquidfoundation which I am not really a fan of. I got this blusher as a result of spending over £5 at Boots. When you spend £5 or more they give you a voucher that entitles you to £5 off any No7/Ruby and Millie product.
I went shopping for my mum to get a present for her friend for her birthday and I spent £25 on the present so I got 2 vouchers.
The second I have yet to spend but with the first I got the blusher below. It's in 'Petal' and it's a mineral (powdered) blusher. They have approximately three or four other colours are available but since I'm fair, I went with the lighter of the range. No7 products are all Hypo-Allergenic and NOT tested on animals :)
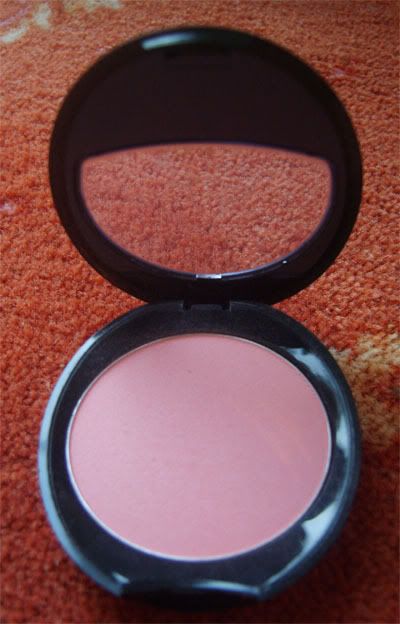
I swatched this in the store way before I had this voucher and I was a little sceptical about the colour. I thought it would be too pink for my skin tone to begin with but I took the plunge and bought recently since I'd run out of mineral blusher and needed a new one.
Price:
Normally £7.50 but I got it for £2.50 with my £5 voucher :)
Texture:
The texture of this blusher is SO soft and light. It's packed tightly which means you don't get any product 'fall out' when you dip your brush into it. This is good because it means your product won't get wasted everytime you apply it.
Scent:
Barely there sweet smell to it and you have to sniff it up close to smell anything at all.
Packaging:
Lovely packaging. It comes in a neat, oval shaped black shiny compact that has a flip lid and it closes with an easy click. No struggling to open or close it. Fits nicely into one's handbag!
Blendability:
Blends beautifully! I wear it over liquid foundation and it goes on very smoothly and evenly. Use a big fluffy blush brush for best results.
Pigmentation (Colour pay off):
Buildable which means you can apply a little for a naturally flushed look or you can build it (by applying more) to create a stronger night time look.