Smoky Silver Eye

Friday, December 26, 2008

Brushes Used:


(Face Brushes)


1. Barry M 3 in 1 Powder, Blush and Bronzer Brush

2. Color Works Blush/Powder/Bronzer Brush

(Eye Brushes)


1. MAC 239 Eye Shadow Brush

2. Ms Make Up Small Eye Shadow Brush

3. Ruby and Millie Blender Brush

4. Ruby and Millie Slanted Liner Brush

5. Ms Makeup Eye Blender Brush


Products used as a BASE:


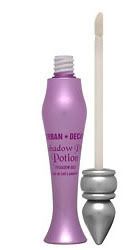
1. Urban Decay Primer Potion

2. Barry M Shimmering Eye/Lip Pencil in #1
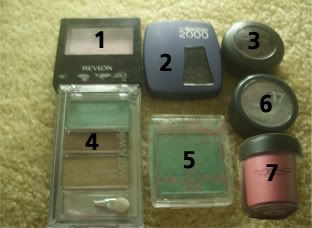


Face:


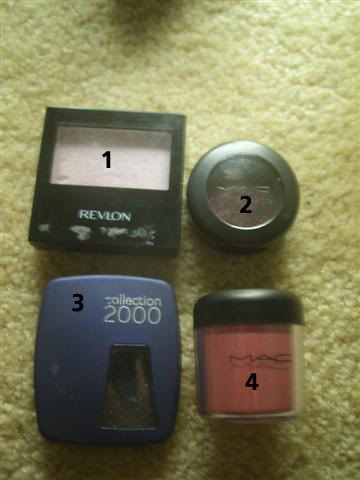
1. Collection 2000 Sheer Loose Powder in 'Translucent'

2. NYC Bronzer


3. No7 Blusher in 'Petal'


Eyes:


1. No7 Trio in 'Twilight'

2. Beauty UK Quad in '9'

3. Revlon Colorstay in 'Pink'


1. Rimmel Sexy Curves Mascara in '01 Black'

2. MeMeMe Eye Spy Eyeliner Pencil in 'Cleopatra'

Lips:


1. Color Works Lipstick in '08'

2. Nivea Pearl and Shine Lip Balm

3. No name clear glittery lip gloss


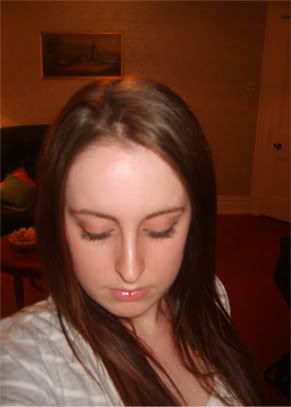
Apply whatever base you use to your lids to begin with. This will ensure your eye shadow not only sticks to your lids better but the colour shows up and does not fade throughout the day. I can not stress this enough. Without a good base you’ll be there forever piling on the eye shadow to try and get the colour to show up and it’s not likely to last very long on your eye if it has nothing to stick to so use a good base. There’s no need to waste eye shadow by trying to pile it on in this way. Just use a good eye primer or even a cream shadow/pencil. I use both because I find my primer does not prevent my shadow from fading on me when worn on its own.


I applied Urban Decay Primer Potion and then used my Barry M cream pencil over the top to give my eye shadow extra staying power. The cream shadow will act like an adhesive for my eye shadow and give it a stronger colour whilst the UDPP stops the shadow from creasing.


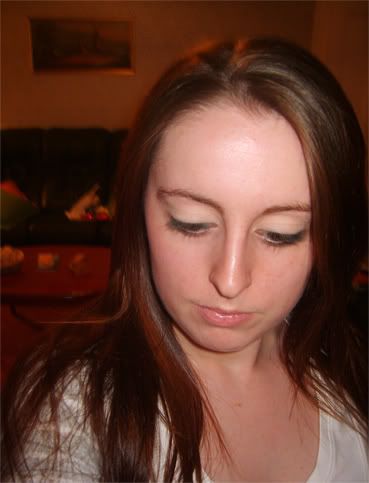
It is entirely up to you whether you wish to apply foundation and blusher (I used brush #1 in my 'face brushes' photo to apply my blusher and loose powder) before or after you apply your eye make up. I also contoured my cheek bones with bronzer (using brush#2 in my 'face brushes' photo) for this look. I personally apply my facial makeup last because if I have any accidents with my eye makeup along the way I won’t ruin my facial make up by wiping off the smudges. It’s all about personal preference so do what makes you happy.


NOTE:
If you do not have these palettes then feel free to substitute the shadows with your own. Just use a light/medium/dark silver shadows where required. So you would use your own silver light shadow for the first step, then a medium silver (something that's a medium darkness) for the second then dark (dark grey/silver) for the third. You can choose to use two types of dark grey if you want to since there are two used to create this look here. Whichever one you have that is most dark should be used last.


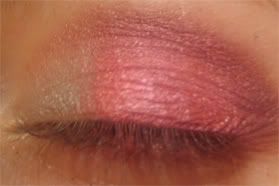
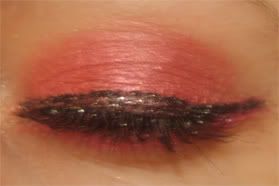
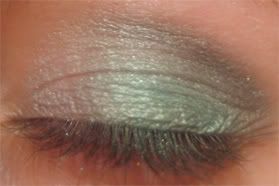
Apply the silver shadow from the No7 trio all over the lid with a regular eye shadow brush (brush #1 in the 'eye brushes' photo). To begin with I like to blend the colour into my cream base using sweeping back and forth motions with my eye shadow brush for the first layer of colour I put on. I then use patting motions to add extra colour on top. The sweeping motions will blend the cream base with the shadow and stop any of the cream base showing through whilst the patting motions make the colour of the shadow appear stronger.


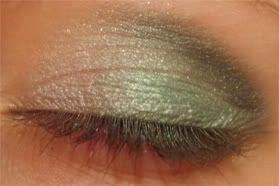
Next take the lighter grey shade from the BUK palette on a dense, smaller eye shadow brush (brush #2 in the 'eye brushes' photo) and work it into the outer half of the crease. Follow along the natural crease line and if you don’t have a crease (or have mono lids) just follow along the line where your eye socket ends. You can feel where it ends with your finger and go along that area. The purpose of this lighter grey here is to soften the darker colours we’re going to put on top in the next steps.


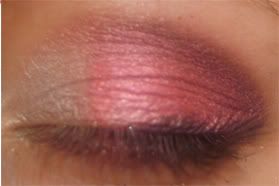
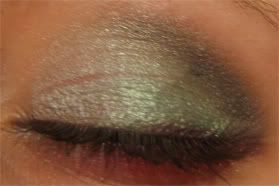
Using a fluffier eye shadow brush (brush #3 in the 'eye brushes' photo), grab the darker greys from the BUK palette and blend into the outer third of your lid and into the crease over the top of the lighter grey. Now there are two darker grey colours in this palette. Begin with the one that is a very dark grey and blend that into the outer third of your lid. Then take the blackish grey and blend over the top of the two shades into both the outer third of your lid and your crease. This will leave you with a nice dark grey smoky appearance. Use circular motions to create that pretty ‘smoked’ appearance. Go just above the crease line but not too far upward into brow bone. Rather stop just above the crease to avoid looking like you have a panda eye.
Also if you notice any of the lighter grey has faded because of the blending feel free to top it up :)


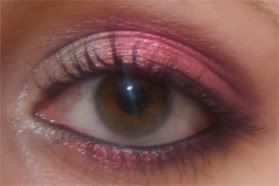
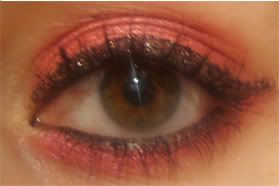
Next using a black eye liner pencil draw a line from the centre of the upper lash line to the end of the upper lash line. Try to go in between the lashes but don’t worry if you can’t, you can always go over the line later using a slanted liner brush (brush #4 in the 'eye brushes' photo) black eye shadow to fill in any gaps. Smudge the line out using a smudge brush or even a cotton bud if you don’t have a smudge brush. I used the smudger on the end of my eye liner pencil.


Line the upper and lower waterlines with a black eyeliner pencil.


Apply 2-3 coats of black mascara to the upper lashes. You can also do the bottom ones if you wish. I don’t usually bother doing this unless I am wearing brightly coloured eye shadow under my lower lashes.


OPTIONAL EXTRA: Line the lower half of your bottom lashes with either a black eye liner pencil or black eye shadow and smudge the line out.


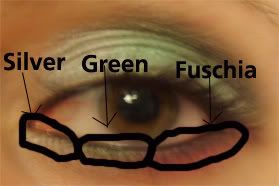
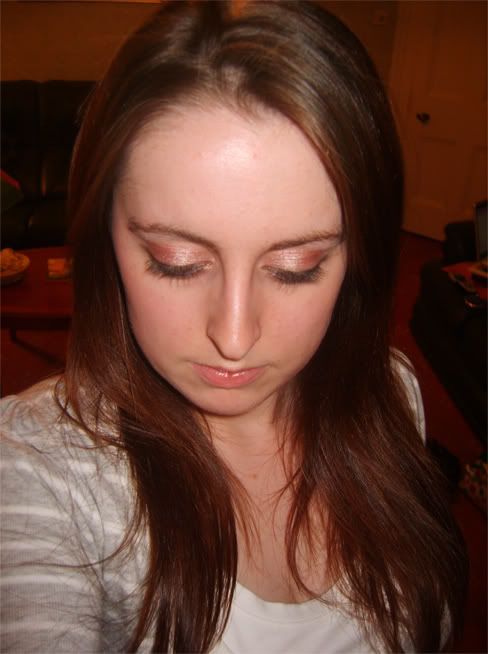
Highlight your brow bone using a fluffy blending brush (brush #5 in the 'eye brushes' photo. I used my Rimmel Colorstay eye shadow in 'Pink' which has been discontinued.) Use a light shadow and add some light silver to the inner corners of the eye. This will really open your eyes up as well as brighten them nicely :)


Finally apply some lip balm to your lips (to moisturise them and stop your lipstick sinking into the lines of your lips - if you find this method doesn't work try applying a clear lip liner over the lip balm and then applying lip stick over the top) and blend a light pink lipstick over the lip balm.


OPTIONAL EXTRA: Adding a clear lip gloss over the top of the lipstick will allow you to almost turn your lipstick into a gloss as it will give your lipstick shine without changing its colour.
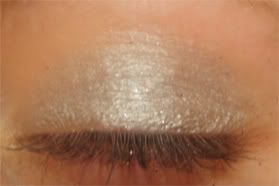
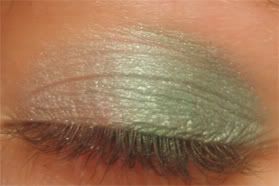
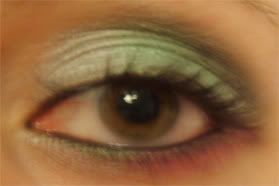
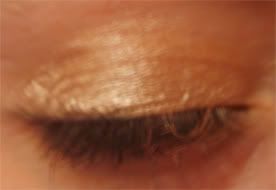
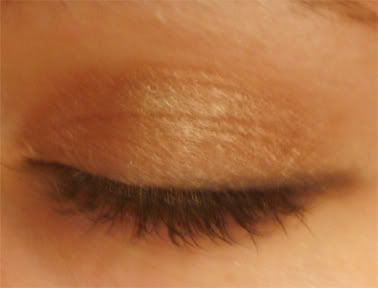


(Close Up)


Beauty UK Eye Shadow Quads

Wednesday, December 24, 2008

Beauty UK Eye Shadow Quads


Price: £2.99 per quad from Superdrug. However, being the bargain hunter I am I got mine for £2.89 at my local market. It might be only 10p difference but hey, I take what I can get.

Left to Right: Shadow quads have no names and are just numbered instead. The one on the right is number 6 and the one on the
left is number 9.


Packaging

As you can see from the photo these quads come in sleek black compacts. They have twist lids and the eye shadows are compressed next to each other in the pans. They're very easy to open and close :)
There isn't a problem with colour cross over either (colours mixing) as the shadows are quite tightly compressed and there isn't any fall out with them.

Scent

No scent


Texture/Colour Pay-Off

The colour pay off of these quads is pretty good but they need a good base to keep them lasting. They're soft but a little chalky. Strangely this only applied to the light blue colour in quad 6 but this wasn't bothersome for me personally at all. They blend beautifully and they do last all day so long as you use a good base!


Quad 9


Quad 6


Swatch of number 9 quad:


Left to Right: Highlighter shade (#1: white), light shade (#2: light grey), medium shade (#3: medium slate coloured grey) and dark shade (#4: deep charcoal).


Swatch of number 6 quad:


Left to Right: Highlighter shade (#1:white), light shade (#2:light blue), medium shade (#3:teal) and dark shade (#4:purple).


How To Use It


The purpose of a quad is to mix and match the colours as you please. You can wear the colours on their own or use the lighter colours combined with the darker colours to create a dramatic smokey or defined look. It's entirely up to you! A lot of people say that trios and quad colours should be used in certain areas of the eye.

(IE: In the case of these quads it would be: the highlighter on the browbone, light shade over the eye lid, medium into the outer edge of the lid and deepest colour in the crease.)

I agree only as far as the highlighting shades are concerned. The rest? I really don't see why you should restrain yourself to using them in just one place on the eye. For example, the light shade could be used on the eye and the medium could be used in the crease to create a soft daytime smokey eye. No need to be so rigid with using your quads! I had lots of compliments when I wore these shadows in this way too which was nice :)


How Well Does It Work?

Really well provided you wear a good base underneath them to keep them lasting all day. The colour pay off is great and they're excellent for creating different looks. Highly reccomend these for those with oily lids because the chalky element of them will help soak up some of the oils on your lids and for beginners too as they will help you to learn how to work with different shadows. The price is really good too. You get 9g of shadow in each quad for £2.99. The only disappointing element was with the number 6 quad. It appeared far less purple than I expected. It was more like a blue-purple than an actual purple.


MeMeMe Eye Spy Eye Liner Pencil in '01 Cleopatra'

MeMeMe Eye Liner Pencil in 'Cleopatra'

Price:
I paid two different prices for each pencil I bought as I got these from Ebay. You can get them from Superdrug for almost £4 which is horrendous so get them off ebay much cheaper instead!


Packaging


Sleek and silver with two lids on each end. One lid for the smudger and one for the pencil end. The lid on the smudger end never stays on though :(

Scent

No scent

Texture/Colour

Creamy texture and deep dark black pigmentation. Colour pay off is excellent.

What Does It Do?

Defines the eyes and can also be used to create a soft smokey appearence by smudging it around the lash lines.

How To Use It

You can use this all over the outer eye, including on the waterlines. I wear contact lenses and it caused no irritation whatsoever when worn on the waterlines. It has a convinient little smudger on the opposite end to the pencil so you can flip it over and use this to create a soft smokey look :) The smudger works pretty well. I tend to just use the edges rather than the flat surface of the smudger as it's a little chunky for my taste. Does the job though!


How Well Does It Work?

It goes on extremely well and lasts about 5 hours on the waterlines before you need to top it up which is pretty damn excellent as it's very hard to find an eyeliner pencil that will stay put on this area of the eye in particular. It stays on all day on any other part of the eye. You don't have to work to get the colour to show and it glides on comfortably and softly. The only problem I noticed with this was that because it is so creamy it smudges like crazy if you aren't careful. If you have an oily complexion you could still use this but I would recommend setting it with a black eye shadow (apply black eye shadow over the eye liner) to stop it from sliding everywhere and keep it lasting a long time. For its lasting power and colour pay off this is one of the best eye liner pencils I have bought.


Buy Again?

I actually already did get another one. I bought both pencils from ebay as in Superdrug these pencils cost almost £4 which is a disgusting price for an eye liner pencil in my opinion. I'd never pay that for an eye liner personally. I spent just over £2 for each pencil on ebay.

Collection 2000 Sheer (Translucent) Loose Powder


Collection 2000 Sheer Loose Powder in 'Translucent'

Price: £4.99 from Superdrug


Packaging
The powder comes in a sifter jar which is basically a make up jar that is covered with a plastic lid that has little holes drilled into the top to allow powder to come through. Most convenient way of packaging loose powder as it allows you to just tip out what you want and it saves a heck of a lot of waste. There is 20g of product in this jar so there's a lot of powder for what you pay :)


Scent
This product has no scent.

Texture/Colour

The powder itself is pale beige in appearance but it's translucent so it is practically colourless when applied. This is useful because it will matify your face but won't alter the colour of your foundation/blusher.
From the appearence I presumed it would feel a bit chalky but it didn't. It felt very soft.

What Does It Do?
Translucent powder is used to set your facial make up. Some also reduce shine on oily skin. Powder basically gives your face a matt finish and helps your foundation to last longer throughout the day. Some powders also reduce shine and have SPF. This one contains SPF that protects against UVA and UVB, silk and vitamin E. It is translucent which means it is colourless when it goes on and won't change the colour of your facial make up.

How To Use It

Tap a small amount of powder into the lid using the sifter jar and pick up with a powder brush. Tap/blow off any excess and apply to your face using circular buffing motions. Blend carefully along the jaw line. Remember a good translucent powder should never leave streaks on your face.


How Well Does It Work?

When I bought this I figured it would be your average joe powder. It is after all Collection 2000. Not that I have anything against drugstore brands but this brand in particular have really turned it around. I expected it to be crappy in comparison to more expensive powders but this isn't true at all. The quality of their products has got SO much better. This powder blends beautifully. It really mattifies the face too. After I applied it I felt my skin and it just left my skin feeling unbelievably soft. I did not expect a drugstore loose powder to be so good.

Buy Again?


It only costs £4.99 and you get a huge 20g jar for your money. It worked wonderfully for me and kept my face matt all day. I am definitely buying it again.

Happy Christmas!

I just wanted to write a quick entry to wish each and every one of you an amazing christmas and very happy new year! Hope you all get what you asked for and stuff your faces all day like I am going to! :D Thanks infinitely to those who supported me throughout my time doing this blog. I love you all! Tutorials coming up in video format by the new year! My room is all finished and all we have to do now is put my bed in and put curtains up and then I can start making videos. I will post the link to my channel on my profile here and in the 'Notice Board' so keep an eye for that if you're interested.

Have a great holiday everyone!

Love Michelle xxx


Superdrug Vitamin Gentle Face Wash

Tuesday, December 16, 2008

Superdrug Vitamin Gentle Face Wash

Can be purchased at Superdrug for £1.99


Packaging

The product comes in a squeeze tube which is the best kind in my opinion as it allows you to get all the product out and reduces waste. The one downfall was the flip lid as it was extremely hard to open. Excellent if you wish to travel with it because there's no chance of the lid coming open but it got really annoying after a while. I'm not sure if it was my product that had a faulty lid like this so I intend to buy another and see if they are all the same.

Scent

GORGEOUS coconut scent! I couldn't stop sniffing it when I bought it and I still can't now!

Texture/Colour

Comes in a smooth fairly thick pearly white liquid


What Does It Do?

This wash is intended to clean your face of facial makeup and general oil/dirt buildup. It's very gentle and suitable for sensitive skin.

How To Use It

It's best to use this to wash your face every morning and night as it will leave your skin clean for the night/morning and by keeping your face clean before you go to bed and when you wake up you are reducing the amount of dirt/oil and this will help prevent blemishes. Wet your face and then squeeze a little of this into your palm. Lather it up with a little water and spread over the face. Rinse thoroughly with clean water and pat dry with a nice dry, fluffy towel.

How Well Does It Work?


In order to test how well this removed my facial make up I washed my face once with it and then used a baby wipe over the whole of my face to see if it left anything behind. It cleaned EVERYTHING off after just one wash which was excellent. Even when I had liquid foundation, blusher and loose powder on it took it ALL off.

Buy Again?

Oh yes. This product is excellent! Great smell, removed ALL my make up and left my skin feeling clean and soft. Plus the cost of it was really really cheap :) I love it.


Witch Natural Beauty Stick Review

As stated in my 'COMING UP' entry, I have been testing the following products for the past month or so:

Witch Natural Beauty spot treatment stick
Superdrug Vitamin facial cleansing wash
MeMeMe Pencil Eyeliner

(NB: I have yet to try the Superdrug exfoliation wash because I am still using my St Ives and didn't want to open a new bottle of product until this one is finished.)

So the next few entries will be individual reviews of these products to keep everything nice and neat. Enjoy :)

Witch Natural Beauty Stick


Can be purchased from any good drugstore/supermarket for approximately £3. I got mine at Superdrug.


Price
It varies depending on where you buy it but I paid approximately £3 from Superdrug.

Packaging

You get 10g of product in a small, palm sized chunky tube. The product comes in stick form and is clear blue in colour. It has a twist cap and to get the product you have to push it up from the bottom. The only downfall to the packaging is that once you have pushed the product up there is no way to push it back down other than by replacing the cap and pushing down, then twisting to secure it which forces the product back down into the tube. It works just fine but it would be easier to have a retractable pump as the lid tends to cause a bit of scratching on the stick and it's a bit fiddly.

Scent

Since it's a Witch product it has the familiar Witch Hazel scent. To me it also has a hint of tea tree. It has a very clean, pleasant smell.

What It Does

It claims to breakdown excess oils and fight the bacteria that cause spots. It can be used for all skin types but states that it is especially effective for oily/combination skin. It is not tested on animals.

How To Use It

You push the product up from the bottom of the tube and apply on to your spots. Do this in a dabbing motion. It states that you should do this as soon as you see your spots appear and you can apply it as often as you like.

How Well Does It Work?

The main reason I bought this was because I wanted something to fight the blemishes that I get around the time of my periods and because I wear foundation quite a lot and wanted something to prevent the bacteria on my face spreading and causing more blemishes when I had my breakouts.

When I applied the product the one thing I noticed aside from the pleasant smell was how cool it felt on my skin. I liked that because it means if you have a sore spot or an inflamed spot this will definitely help to reduce the redness and the swelling. It is also very moist despite looking like a dry stick of product.

My skin type is combination but I get more dryness on my skin than anything (but there are other factors that make it combination) and I noticed this dried my blemishes up straight away. It's effective but because my skin is dry in places it made my skin so dry it flaked a little bit around the blemish so if you have dry skin be wary of that and make sure your skin is moisturised before you use this. If you have oily skin this will be more than great for you because it'll help control the oiliness around your blemishes very well.

It's also important to dab the stick on and not rub it on. Don't use the stick like you would a roll on deoderant as doing so can leave a white powdery residue when the product dries. Just dab onto the spot once or twice and that will prevent this from happening.

I used this four to five times during the day and it dried up my blemishes within a day. It didn't get rid of them but it did help reduce their appearence very quickly. I just also want to mention that I drink lots of water so I believe this would've assisted the stick in clearing my skin up within this time.

Overall I really liked it. It cooled the swelling of my spots making them less red which made them easier to cover up with make up and it's antibacterial too which is a great bonus. It worked fairly quickly but in order to speed up the clearing process you must use this at least four to five times a day. I used this once, twice and three times on different days to test it and I found it was most effective when used more frequently during the day. When I used it less than four times it only barely did anything but dry my spots a little.

The fact that it comes in such a small tube makes it easy to slip into your bag so you can carry it with you to keep applying it during the day :)

Party Look 3: Smokey Silver And Fuchsia

Tuesday, November 25, 2008
Products In This Tutorial:


1. Revlon Colorstay Mono Shadow in 'Pink'

2. MAC Mono Shadow in 'Beauty Marked'


3. Collection 2000 Mono Shadow in 'Black'


4. MAC Loose Pigment in 'Fuchsia'


I also used No17 in 'Spirit' which is a silver shadow and I'm so stupid I forgot to put it in the product photo >.<


Tutorial

After applying your base, take the silver shadow and apply it all over the lid with a regular eye shadow brush


Next take your fuchsia pigment on your eye shadow brush and cover just over half of the outer part of your lid with it, leaving about one third of the inner corner with the silver still showing. When working with loose pigment remember to dab the colour on little by little to prevent fall-out and use a slightly damp brush. You can diffuse the line where the fuchsia meets the silver with a dry brush once you have done this so that there are no harsh lines where the colours meet and it all looks blended nicely.


Take a small, compact eye shadow brush or smudger brush and apply a little (one or two dips into the shadow is plenty) beauty marked to the tip of the brush. Drag the tip of your brush with the shadow on it into the outer half of your crease. (Go easy. Only take a small amount because you don't want this to look too strong or it will create a panda eye once we're done with the other steps!) Blend using 'windshield wiper' motions right into the line of your crease and if you happen to not have a defined crease just go slightly above where your eye socket is. Blend well into the fuchsia.


Take a small amount of black shadow (on the same small compact brush) and blend into the beauty marked. What you will be left with is a fairly dark crease. If it looks a little like a scary panda eye at this point DON'T worry because now we are going to take some of the fuchsia on the same small brush and go over the top of the beauty marked and the black shadow. Blend well into the crease.

To diffuse this further and to create a slightly smoked appearance take a fluffy eye blender brush and blend the colours out once more to create a softer appearance. Careful not to take the shadow too far up your brow bone. Slightly above your crease line is usually enough or else you'll look overdone. Clean up the edge with a cotton bud when you're finished. If you have found some of your fuchsia or silver has faded a little at this point with all the blending feel free to top both up.

Next take a liner brush and dip it into a black eye shadow and line the outer half of your upper lash line and outer half of your lower lash line. Dab the shadow on first then blend out. Go in between the lashes on the top and bottom. Diffuse the line you have drawn on your lower lashline with a smudger to give a sexy smudged effect. Clean the edge of your line with a cotton bud if you need to.


Using a liner brush take some of the silver and apply to the very inner corner of the eye. Then take some fuchsia on a liner brush and start from where your silver ends and line all the way to meet with the black you just applied. You should now have silver in your inner corner, fuchsia near the middle and black on the outer half of your lower lash line. Line your waterlines with an eyeliner pencil. Highlight the browbone with a light shadow and finally apply mascara on the upper and lower lashes to finish.


Yay :)

Party Look 2: Glittery Fuchsia Eyes


Pre-Tutorial Tips:


If you do not have a gel eye liner with glitter you can apply a little 'body'/'eye' glitter separately over the top of your black shadow. Just make sure the body glitter you use is safe to use on your eyes!

If you are using a pencil/liquid liner you can just go over that with glitter too.

OR

If you have one you could just use a glittery eye pencil or a glittery black shadow.


Tutorial


Apply your usual base and then take your fuchsia and apply it to the whole of your lids


Line the entire upper lash line with some black eye shadow using a slanted liner brush. Just draw a thin line as close as you can to your lash line. Try and go in between your lashes with the shadow to make your lashes look fuller and to make the appearence of the glitter much darker.

Line the upper lash line with the glitter gel eye liner or whatever you have. Go along the upper lash line and wing it out. If you're not using a glitter gel liner just create a wing with your pencil/liquid liner and add glitter over the top. Otherwise use your glittery pencil/shadow for this step.


Line the entire lower lash line with the fuchsia. Neaten the edge with a cotton bud if you need to. Line your waterlines and apply mascara. False eye lashes would also look great with this look :) I wanted to wear falsies for this photo but I looked everywhere for my false eye lashes and couldn't find them :(

Party Look 1: Silver, Green And Fuchsia Smokey Eye


It is my very good friend Leesa's birthday in 3 days time so I wanted to do a series of party looks in honour of this. I also would like to dedicate all of these looks to her.

Love you babe xoxo


(Yes I had to photoshop the Fucshia in if you're wondering why it looks a little odd. This is what happens when your life is very busy and you don't have time to re-do your product photos)


1. Revlon Colorstay Mono Shadow In 'Pink'

2. Collection 2000 Mono Shadow In 'Black'

3. MAC Mono Shadow In 'Beauty Marked/Velvet'

4. Wet And Wild Trio - This product has no name on it.

5. Collection 2000 Intense Solo Shadow In 'Enchanted'

6. No17 Mono Shadow In 'Spirit'

7. MAC Loose Pigment In 'Fuchsia'


Note: Because the Wet And Wild trio shown here is hard to come by you can just choose any shade of light green to substitute it.


Tutorial

Apply your base and then sweep 'Spirit' (or any light silver shadow) over the entire lid.


Take the green from the Wet And Wild trio (or any light green) and apply to the outer half of the lid. Apply Enchanted (or any medium green) over the top of this in the same area.


Pick up a very small amount of the beauty marked shadow on a small compact eye shadow brush and gently sweep into the crease. Stop half way along the crease line.


Take a little black shadow and blend it into the crease over the Beauty Marked. Then take a little Enchanted on the same small brush and go over the crease line once more. Blend well.


Line the outer half of your upper and lower lash lines with black eye shadow


Line your waterlines with a black eye pencil then using a liner brush or a small compact brush, line the inner corner of your eye with silver shadow. Next take Enchanted and line this shadow from the point where your silver ends and then line from this point to the outer corner with Fuchsia.

I have demonstrated where to place the shadows in the photo below (I also realise that I've spelled 'Fuchsia' wrong in the photo.):


Apply mascara on both the upper and lower lashes to finish. It's important to apply mascara to the lower lashes in this case as the colours on the lower lash line can cause the lower lashes to look less prominent and so it helps them to show through all the colours.

Urban Decay Primer Potion

Tuesday, November 18, 2008
I heard a lot about this product before I bought it and to be honest I was put off buying it for a long time by the price. It has been around for quite some time but recently I decided to take a look on Ebay to see if anybody was selling it at a reasonable price because £15 to £18 for an eye primer is beyond ridiculous. I was thrilled to find a seller who was selling the 10ml bottles for just £9. I read many reviews beforehand also and many people said they loved this product so I figured I would give it a try.

If you do not know, Urban Decay Primer Potion is a cream that you blend over your eyelids before adding eye shadow. It claims to stop eye shadow from creasing and fading.

I have now tried this product five or six times and the majority of those times were on nights out or a long days at university. I also wore it for cheer and dance practices to really test its strength.


Packaging:

As you can see in the photo below, it comes in a purple curvy genie shaped bottle. The packaging itself is very cute but it's not practical at all. Once you've used half of this bottle you will need to cut the packaging and de-pot the product (put it into a sample jar) in order to be able to carry on using it and that's really crappy. This is because of the shape of the bottle, the fact that there's no room for the wand to twist around to pick up product and because the wand only reaches a certain point in the bottle due to its length. At first you're led to believe you have run out of product but in fact there's probably two whole month's worth of it still stuck to the sides of the bottle! I won't enjoy doing this eventually because I don't really want to damage my packaging because I paid for it. I think Urban Decay really need to sort that one out.


In the meantime you can find a great tutorial on how to de-pot your UDPP here:

Clumps of Mascara

I also actually e-mailed UD to complain about the packaging and they told me they were working on new packaging and appreciated my feedback but were unwilling to offer me any compensation for any product that went to waste because of their packaging. Think what you will of that.


Texture

Smooth, creamy texture. Blends over the eyelids beautifully. I read reviews that this was 'drying' but it isn't drying at all. It's so smooth and soft. I love the way it feels and goes on. I really wish they could make liquid eye shadows like this because it just goes on so wonderfully.


Scent

This product has no scent

Performance

As I stated above I wore this under my shadow during either a night out, long day at uni or my cheer/dance practices to REALLY test its power. When I am at practices I jump, dance and get really hot and sweaty.

What I found was it did prevent creasing but it didn't prevent fading when worn on its own without any kind of cream shadow over the top. That was disappointing. I would recommend wearing this and then applying a cream shadow over the top to give your shadow extra staying power. Otherwise you'll find your shadow will only last about 6 to 8 hours before it starts to fade. When worn with a cream shadow your eye shadow will last all day and at least half, if not all of the night! Mine went on all day and all night but it depends on your skin type as to how makeup will work on you.

So would I purchase this product again? If the packaging were better (say in a tube), I would definitely. It's awesome. Every eye shadow I had that would crease up on me no longer does. I love it and I wish I'd tried it sooner. I think I'll just wait until they re-design the packaging and make do until then. I really don't want the hassle of cutting up a bottle and de-potting product everytime I need a new bottle of this stuff.

My advice is not to buy it in department stores because they'll charge you the earth for it. Look on Ebay instead.

Quick And Easy Looks For School Or Work

Wednesday, November 12, 2008
Most of us don't have much time in the morning when applying make-up so I decided to just do some very easy looks for school/work in this entry. Basically we'll be working with mono (single) shadows. These are fast and simple and don't require you to spend time blending. These looks can all be done in about five or ten minutes.


It's entirely up to you whether or not you want to wear foundation but a quick substitute would be pressed powder as this will even out your skin tone, prevent shine and it's quicker than foundation to apply when you have little time. Just sweep some over the areas of your face that you need it. Or you can use a tinted moisturiser. Obviously if you choose to wear foundation you should allow yourself more time. In all of these looks I am wearing liquid foundation (MAC Studio Fix in NW15) and blusher (No7 Mineral Blusher in 'Petal'). I used Urban Decay Primer Potion as my base. (See my upcoming review on this product to find out what it's like and how to use it.)

From The Base Up


Apply a good base first. A base is either a creme shadow or eye primer that you apply to your lids before you put your eye shadow on. You can use any creme shadow or eye primer of your choice. A base gives your eye shadow something to stick to and this is important because it will stop your eye shadow fading, creasing or sliding off.

Apply Shadow


Next choose a shadow and pat it all over the lid with an eye shadow brush. Neutral colours work better for the day because they aren't overwhelming.

Colours I recommend for a daytime look include: taupe, light brown, peach, light mint green, lavender, baby pink, baby blue and ivory.

Line With Eye Shadow


If you think a shadow alone looks too 'flat' or 'one dimensional' on your eyes you could always take a plain black eye shadow and line half of the outer portion of your lids (go in between the lashes with the black shadow using a slanted liner brush to give the lashes a fuller appearence) and create a very thin 'wing' with the black shadow to give the shadow a bit of a kick. Using a dark shadow to line your eyes is much faster than using liquid liner and is much less harsh for the daytime. Take some shadow on your brush and pat it onto the lash line first before blending to make sure the colour shows up well.

Here's a few shadows I would wear in the day:


No7 Mono Shadow in 'Tender'


No7 Mono Shadow in 'Magnolia'


Bourjouis Liquid Shadow in 'Beige Metallique'


No17 Mono Shadow in 'Statuesque'


Natural Collection Mono Shadow in 'Milk Chocolate'


Finish by lining your waterlines with either a brown or black eye liner pencil and about two layers of mascara on the top lashes only. If you do choose to put mascara on your lower lashes I would suggest only going lightly. Too much will create a darker, heavier appearence that's more suited for night time.