Mini Miss Sporty Haul

Tuesday, September 30, 2008

Hi all,

Today I went shopping to pick up some stuff and Miss Sporty had an offer on. You can buy any two of the following: Fabulous Lip Gloss, Lip liners and Perfect Colour lipsticks for £3.99. Miss Sporty are a fairly cheap drugstore brand but I have used their lipgloss before and had no complaints so thought I'd give some of their stuff a try again. I have listed the original prices below each product but I got them both for £3.99.

I bought a lipstick and a lipgloss.
I have really been into light pink shades lately as you might be able to tell!

The lipsticks on offer are supposed to last up to 6 hours and the lip glosses promise a 'wet look' and are non-sticky.

Oh, and Miss Sporty doesn't test on animals so they're cruelty free :)

You can find more of their products here.

Perfect Colour Lipstick #009 in 'Innocence'
Original Price: £2.49


Swatch of Lipstick


Fabulous lip gloss in 'Powder Pink'
Original Price: £2.79


Swatch of lip gloss


Collection 2000 Haul

Thursday, September 25, 2008

I went shopping today to buy Christmas presents for a friend and I got a couple of things for myself along the way.

Collection 2000 is a UK based make up brand and to be fair, for the price you pay, the make up is very good quality.

As always I will do reviews on these products once I have used them.

Collection 2000 is available in Superdrug and Boots.

Collection 2000 Kohl Eyeliner Pencil #28 in 'Green Marine'
Price: £1.99


Swatch:


Recently they released their new intense solo shadows (they are all 8 hour wear and crease resistant) and you can pick one of these up for free with any other two C.2000 products. Although I should mention that you can't buy say, an eyeliner and 2 solo shadows as the discount only comes off a solo shadow if you buy the solo shadow with 2 OTHER C.2000 products. I was quite annoyed about this and I plan on writing to C'2000 about it. I think it's really stupid!


Intense 8 Hour Wear, Crease Resistant Solo Shadows (On the left is '03 Enchanted' and on the right is '09 Velvet')
Price: £1.99


Shadow Swatches:


They also released their new Volume Sensation mascara. It comes in a very chunky tube with a huge brush. At the moment it only comes in Black. It promises volumised, long 'clubbing' lashes.

Volume Sensation Mascara #1 in 'Black'

Price: £4.99


The mascara in particular looks very promising with the huge brush so I am really excited to try it and see how it goes :)

Boots Botanic Tinted Moisturiser Review

Sunday, September 14, 2008
Hello all :) Thought I would write up a review before I head off to bed.

I recently made the decision to stop wearing foundation (unless I am going out for the night clubbing or something similar). I wanted something that would give me an even complexion and make me look healthy without taking ages to apply and looking cakey. I normally use MAC Studio Fix foundation but even wearing it every few days was making me break out. It is supposed to be oil-free and I drink lots of water and take good care of my skin but I felt like it wasn't doing my skin any good from the break outs I was getting from using it. Also I never have time in the mornings to spend ages blending foundation over my face. It takes too long for my liking. I wanted to find something quick and easy to give me a healthy looking, even complexion in a decent amount of time.


So I have decided to give my skin a complete break from foundation and I recently bought a tinted moisturiser as a result. I looked online at various ones that were within my budget (I was looking to spend less than £5 on one). I also looked at reviews for the products I was finding and what stood out was quite a few that highly recommended Boots Botanic Tinted Moisturiser.

The reviews I read were so good/convincing that I actually took the plunge and handed over my 3.99 for a 75ml tube to find out if what was being said was actually a true in any way.

This is the product description from the Boots website:

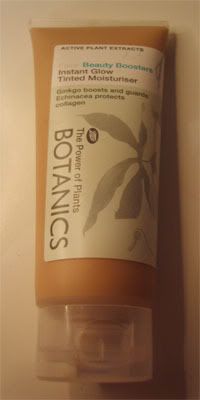
"The Botanics range combines active plant extracts in carefully balanced formulations to give you the right product for your skin type. Botanics Instant Glow Tinted Moisturiser boosts the skin and guards against free radicals, formulated with Ginkgo a renowned tonic. Botanics Instant Glow Tinted Moisturiser contains a complex of antioxidants shown to stimulate microcirculation and protect skin, along with Echinacea which protects collagen, and reduces the visible signs of ageing. Plant extracts at levels that really work, combined and formulated for unbeatable product performance. Naturally. Authenticated by Royal Botanic Gardens, Kew."
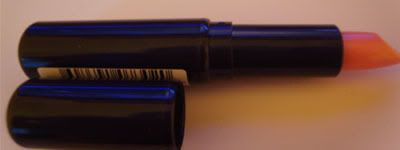
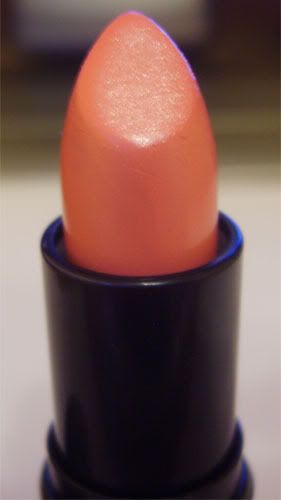
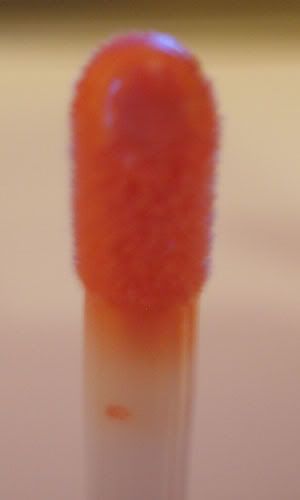
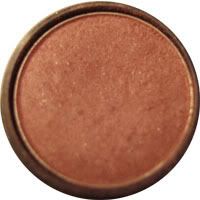
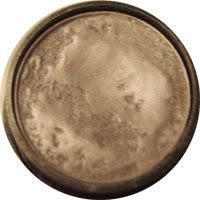
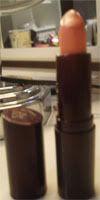
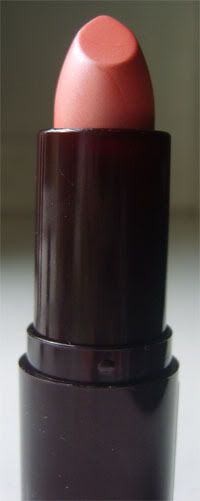
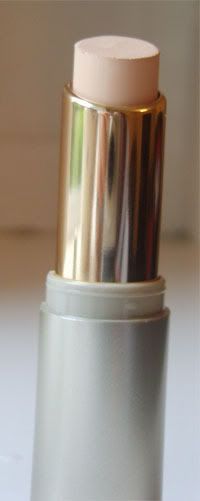

The product itself:


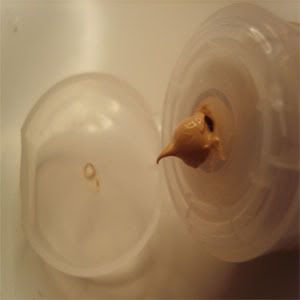
Some of the reviews described the appearance as 'mud-like' but to me it looks more like liquid foundation when you squeeze it out of the tube.

It's very light in texture and very easy to blend. I expected a mud-like thick texture but it isn't like that at all.


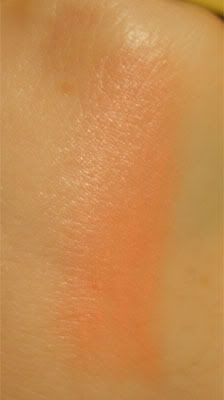
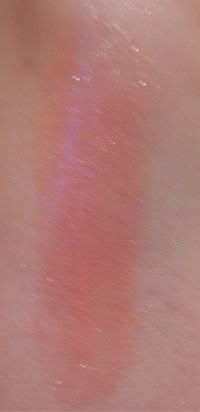
It also smells very nice. Just like a regular moisturiser to be honest, it's a slightly sweet medicated kind of smell. Don't take that the wrong way either, it's very pleasant.


The reviews claimed that it was more suitable for fair skinned people and very buildable for those with darker skin. That wasn't true for me. If I apply even the slightest bit too much I do end up looking like an orange but if I just use sparing amounts I am fine. I have to be too careful with this which was horribly disappointing as now I'll have to fuss and make sure I haven't put too much on. One day I actually applied it and went to the bathroom a minute later only to see an orange line around my chin. That was disappointing.

When I first applied it I was terrified of looking like a tangerine. The colour of the stuff in itself is enough to send a fair skinned person like me running for the lemon juice and salt. I guess I had reason to worry on that one. When applied sparingly it did give me a very natural looking complexion. It does also give you a bit of a healthy glow too so it lives up to what it says it does. It's wonderful for someone like myself in that respect because I'm so fair I often rarely have that natural glow that you get with naturally tanned/darker skin. This gives me that glow that I want.

All in all I do like it very much. I only wish it was as buildable as the reviews claimed. The best part is there's no need for me to remove it at the end of the day like I would have to with my foundation and it contains organic ingredients that take care of my skin :)


I am really pleased with it but I won't be buying it again because it's not as lightly pigmented as I originally thought. I want something I can blend into my face and even using a tiny bit too much of this made me orange and I would prefer something that didn't do that.
The price is excellent though. It's good for the skin, not tested on animals and it's affordable. If you are a very tanned person this will be excellent for you. If you're fair like me, use it sparingly or it will turn you into an orange. All in all it gets a fair thumbs up from me.

I am planning to contact Boots and give them my feedback on this product and maybe they can use that to come up with something for us fair people ;)

Enhance Your Eye Shadows

This tutorial will help you to get the most out of even the cheapest of your eye shadows. I'm going to show you how to bring the colour out of your shadows and make them last longer on your lids. The most important part of applying eye make up is not applying the shadow itself. It is applying something called a base first.


What is a base?


A base is something you apply under your eye shadow. Basically you apply your base/primer first and then your shadow over the top. A base is often referred to as an 'eye primer' and you can find them everywhere for any amount of money imaginable. There are so many I could not possibly cover them all in one entry. (There are as many primers as there are eye shadows!)

What does a base do?

A base will make your shadow's colour show up better and make your shadow stay on longer. Without a base even the most expensive shadow won't show up that great and will probably wear away much quicker. If you use loose 'powdered' eye shadow in particular without a base it will most definitely fall off quickly and in some cases hardly show up at all.

What kind of base should I buy?

The most important thing to remember when applying a base is if you use a coloured one it may show up in your shadow. So use either a matching colour (to enhance the shade of your eye shadow) or a neutral shade (cream, beige, tope, most pastels etc). You can also buy primers that do not show up at all. Just look for 'eye primer' products as these will be less pigmented or even clear in some cases.

Here's a few bases/eye primers you can buy:

(Expensive)

Urban Decay Primer Potion
Too Faced Shadow Insurance
MAC Primer/Paint Pots


(Cheaper Alternatives)

L'oreal Decrease Primer
Barry M Shimmering Eye/Lip Pencils
Any ordinary cream based shadow
Water (Yes, I said water - though this is more of a way to enhance the colour than anything else)

You can also use foundation or concealer but to be completely honest I tried using my MAC Studio Fix foundation one night and my eye shadow was barely there after just an hour. And MAC foundation costs £19.50 so that said a lot for me personally.


I now regularly use the Barry M Shimmering Eye/Lip pencils and they work brilliantly. They cost me barely £4 and they make my shadows not only show up but last all day.

Creamy textured bases work best because they trap the colour particles closer together and this results in a stronger looking colour. They also make the shadow 'stick' to your lid much better.

Below is a photo of two shadows I swatched on the back of my hand. On the left you can see swatches used with a base and on the right you can see the shadows applied without a base. In this instance I used my Barry M #1 Eye/Lip Shimmer Pencil. As you can see, using a base helped bring the colour out much better. You can hardly see the colour of both shadows when applied without a base and trust me, I really tried to get them to show.


What about using water?

I mentioned water in my above list and I would like to now elaborate on that point. Honestly, water works very well. This technique is known as 'foiling' as it gives your shadow a metallic appearance. It also enhances the colour of your shadow. As far as making your shadow last I'd say it's not bad but it depends on how oily your complexion is as to how long shadow stays on you in general. Also it's pretty obvious that using an actual primer/base is your best option. This is just a little trick you can try :)

What you do is dampen your brush with water and then apply the shadow to your lid with your damp brush.

It is best to pick up your eye shadow on your dry brush first before dampening with water as dipping a wet brush into a shadow can sometimes ruin it and make it lumpy. It is also vital not to wet your brush too much for the same reason. It is best to just dampen it.

A good way of dampening your brush is by spraying it with water. I bought a fairly large cheap empty travel spray bottle from Boots (they can be found in any drugstore) and I can't live without it. By spraying it rather than dipping it in water you avoid soaking your brush and making a mess.

Then simply dab over the lid. I tend to use this method when I buy a shadow that doesn't show up well even with a base because it usually makes it show up well :)

Silver With A Lilac Wash Tutorial


Products Used:


1: Barry M Eye and Lip Pencil in '#5'
2: Rimmel Lipstick in 'Nude Pink'
3: No17 Mono Shadow in 'Spirit'. This is still available from Boots :)
4: No17 Mono Shadow in 'Lavender'. I bought this a long time ago and since then it has been discontinued but I am sure No17 still make a good substitute. Any Lilac shadow will do if you don't have this one.
5: MAC Mono Shadow in 'Beauty Marked'
6: Rimmel Lash XXX Mascara in Non-Waterproof

Brushes Used:


1: Ruby and Millie Slanted Liner Brush (£5 from Boots)
2: MAC 239 Eye Shadow Brush
3: MAC 213 Fluff Brush
4: Barry M 3 in 1 Powder/Blusher/Bronzer brush


Both shadows used in this tutorial are from the No17 mono shadow range. These are really well pigmented for the price. They blend VERY well and are much better than the No17 loose eye dusts in my opinion. My 'Spirit' shadow looks slightly destroyed (I had a bit of an accident with it when I dipped my brush in when my brush was soaking wet rather than damp! I'm silly, I know) but honestly, it still works fine.


Lavender


Spirit


Tutorial


Step One: Base

Begin by applying a base of your choice. This helps both the colour of the shadow to show better and the shadow to last longer. In this instance I have used Barry M #5 Eye and Lip Shimmer Pencil. Remember to smooth out your base with your finger (particularly if you use a cream base) because otherwise you may see uneven lumps and your shadow may not go on as well.


Step Two: Silver

Pat the silver onto the entire lid and blend into your base using an eye shadow brush. I have used my MAC 239 in the direction shown in the photo below.


Step Three: Lilac


Work the lilac into the crease. I used my MAC 213 fluff brush. I have demonstrated where to position the brush in the photo below:


Then take a fluff brush and work the lilac into the outer one third of the lid:


The result should look something like this:


Step Four: Beauty Marked


Okay so with all of these light colours on your lids you may find your eyes appear a little 'flat' so to add some depth take your eye shadow brush and literally dab it ONCE into the Beauty Marked shadow (or any grey/black shadow you have). Don't pick up too much because this is intended as a day look and adding too much dark colour will turn it into a night time smokey eye.


Step Five: More Lilac

Go over the black with some more of the lilac shadow. Work into the crease and over the outer one third of the lid. This is to insure your lilac has depth but isn't too dark:


Step Six: Line Up

Because you are using shadow for this next step you will first need to line the area with a base of some sort. (Otherwise the shadow will fade quickly and the colour won't appear as strong.) I just sweeped my slanted eyeliner brush against my Barry M Eye/Lip #5 base pencil to pick up the product and lined the outer half of my upper lash line and just past it with my shadow. I do it this way because the tip of my pencil is chunky and using the pencil alone to line my lash line creates a very thick line and I wanted a thinner one.

Using a slanted liner brush work some of the Beauty Marked shadow into the outer half of the upper lash line. Don't go all the way in. Just stick to the outer half. Begin by patting the shadow along the line (so it sticks into your base and so it shows better) and then smooth it out by sweeping the brush over the lash line.


Step Seven: Tick Me Off


To add some flare to this look add a thin tick of black shadow.

Start from the end of the line you made on your upper lash line and keep your eye closed as you draw your 'tick' to insure the line is evenly joined up and that the tick looks properly 'connected' to the upper lash line. (Ie: To stop it looking like it's flying 'off' your lid) Fill in any gaps by patting the shadow into the lash line.

A thinner tick looks best with this look. I also added some of the Beauty Marked shadow to the outer half of my lower lashes:


Step Eight: Complete Me


Complete the look by lining your waterlines with a black eyeliner pencil and then apply 2 coats of any mascara of your choice to your upper lashes. I used my Rimmel Lash XXX mascara and my No17 black eyeliner pencil in 'Onyx'.

For your lips I would recommend a light frosty pink or peach colour to go with these colour shadows. I used my Rimmel lipstick in 'Nude Pink'.


Finally, dust some translucent powder over the face to finish. I used my Collection 2000 powder in Translucent.


Final Look:


Haul

Monday, September 8, 2008

Today I haven't been feeling very well. Without wanting to gross you all out I am suffering menstrual cramps at the moment. I'll leave it at that.

Anyway, earlier I decided that a little gentle exercise might help me and I walked into town. So I managed to persuade my mum to let me have some money and off I went.

It was well worth the trip! I'm so excited with my purchases, I couldn't wait to show you.

I went to Boots (which, I hear, has now come to the USA :) ) and I was browsing Rimmel lipsticks and did not notice there was a 3 for 2 offer until I got to the till and the lady working at the store told me about it. So I then had to go back and pick another lipstick which of course didn't take me long ;) Haha.

Actually I did look at the sign that stated the offer but I thought it was for that extra shiny lip gloss that they're selling at the moment since the sign was right above them on the display stand. (Which by the way smells really good! I didn't buy it but I will be doing so in future) The 3 for 2 is actually on ALL Rimmel products at the moment so you might want to take high advantage of it!
I got three lipsticks for £8. BARGAIN!

I was looking for long wearing lip colour but Maybelline's Super Stay costs £7 (I've heard it's very drying too but I've never tried it), Max Factor/No7 lipsticks are just ridiculously priced (£9.25? No thanks!) and all of them were out of my budget. Then I ended up looking at Rimmel's.

These lipsticks are supposed to last 8 hours which is fine with me. I wanted some for my nights out and I'm usually out for around 6-7. I also wanted the lighter shade to either wear with a smokey eye or wear in the day. I will be testing the wear-ability as I wear the ones I bought. I am SO in love with the colours!


206 'Nude Pink'


006 'Pink Champagne'


138 'Dare'


Swatches


1: Nude Pink
2: Pink Champagne
3: Dare


Whilst I was at the store browsing the lipsticks I was approached by a lady who asked me if I wanted her £5 coupon which entitles you to £5 off No7/Ruby Millie products. Boots give them out to you if you spend £5 or more in store. Use them to your advantage because No7 and Ruby and Millie are expensive brands and you can get a whole chunk of money off them. It was completely out of the blue and I asked if she was sure and she said she didn't want to spend anymore and had no use for it so I was EXTREMELY happy and used the coupon to get £5 off a No7 concealer. It originally costs £7.50 but I got it for £2.50 :) This actually cost me less than a Collection 2000 concealer and it's a much better brand. I ended up getting another £5 coupon which I plan to use on Ruby and Millie when I am shopping next. I wanted to wait because the Boots near me doesn't stock R+M so I'll have to visit a larger store to find it.

No7 Quick Cover Concealer Stick - 'Fair'


Reviews will be coming up for ALL of these products in this haul as soon as I have had a couple of weeks use out of them. I have already tried them but want to allow a few weeks to make a better judgement because I feel you can only usually see a product's true form after a few week's use.

However, from the swatches so far I can say that the lipsticks feel very soft and are well pigmented as you can see in the photos.

I have actually tried the concealer too and it blends very well and covers redness really well too. It's also very soft in texture.

Both the lipstick and concealer are non-greasy.