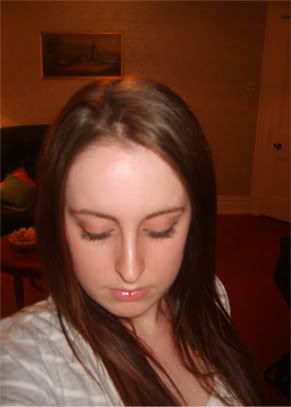
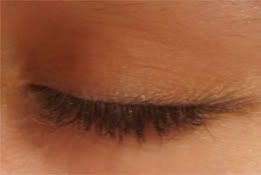
Party Look 1: Silver, Green And Fuchsia Smokey Eye

Tuesday, November 25, 2008

It is my very good friend Leesa's birthday in 3 days time so I wanted to do a series of party looks in honour of this. I also would like to dedicate all of these looks to her.

Love you babe xoxo


(Yes I had to photoshop the Fucshia in if you're wondering why it looks a little odd. This is what happens when your life is very busy and you don't have time to re-do your product photos)
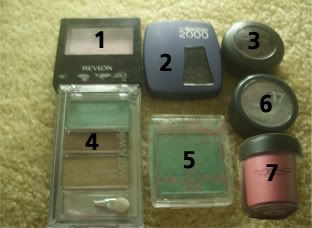


1. Revlon Colorstay Mono Shadow In 'Pink'

2. Collection 2000 Mono Shadow In 'Black'

3. MAC Mono Shadow In 'Beauty Marked/Velvet'

4. Wet And Wild Trio - This product has no name on it.

5. Collection 2000 Intense Solo Shadow In 'Enchanted'

6. No17 Mono Shadow In 'Spirit'

7. MAC Loose Pigment In 'Fuchsia'


Note: Because the Wet And Wild trio shown here is hard to come by you can just choose any shade of light green to substitute it.


Tutorial

Apply your base and then sweep 'Spirit' (or any light silver shadow) over the entire lid.
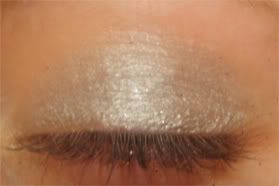


Take the green from the Wet And Wild trio (or any light green) and apply to the outer half of the lid. Apply Enchanted (or any medium green) over the top of this in the same area.
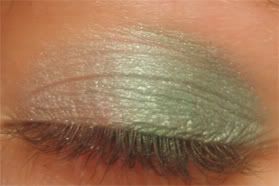


Pick up a very small amount of the beauty marked shadow on a small compact eye shadow brush and gently sweep into the crease. Stop half way along the crease line.
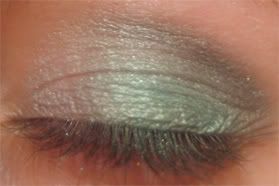


Take a little black shadow and blend it into the crease over the Beauty Marked. Then take a little Enchanted on the same small brush and go over the crease line once more. Blend well.
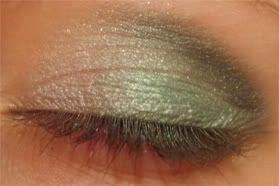


Line the outer half of your upper and lower lash lines with black eye shadow
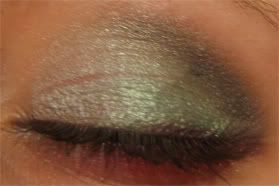


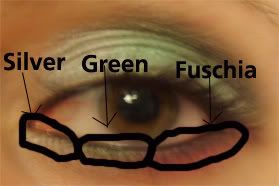
Line your waterlines with a black eye pencil then using a liner brush or a small compact brush, line the inner corner of your eye with silver shadow. Next take Enchanted and line this shadow from the point where your silver ends and then line from this point to the outer corner with Fuchsia.

I have demonstrated where to place the shadows in the photo below (I also realise that I've spelled 'Fuchsia' wrong in the photo.):


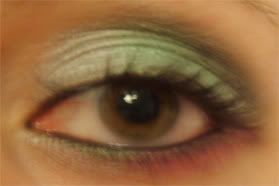
Apply mascara on both the upper and lower lashes to finish. It's important to apply mascara to the lower lashes in this case as the colours on the lower lash line can cause the lower lashes to look less prominent and so it helps them to show through all the colours.
Urban Decay Primer Potion

Tuesday, November 18, 2008
I heard a lot about this product before I bought it and to be honest I was put off buying it for a long time by the price. It has been around for quite some time but recently I decided to take a look on Ebay to see if anybody was selling it at a reasonable price because £15 to £18 for an eye primer is beyond ridiculous. I was thrilled to find a seller who was selling the 10ml bottles for just £9. I read many reviews beforehand also and many people said they loved this product so I figured I would give it a try.

If you do not know, Urban Decay Primer Potion is a cream that you blend over your eyelids before adding eye shadow. It claims to stop eye shadow from creasing and fading.

I have now tried this product five or six times and the majority of those times were on nights out or a long days at university. I also wore it for cheer and dance practices to really test its strength.


Packaging:

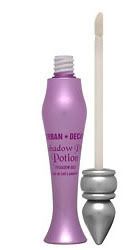
As you can see in the photo below, it comes in a purple curvy genie shaped bottle. The packaging itself is very cute but it's not practical at all. Once you've used half of this bottle you will need to cut the packaging and de-pot the product (put it into a sample jar) in order to be able to carry on using it and that's really crappy. This is because of the shape of the bottle, the fact that there's no room for the wand to twist around to pick up product and because the wand only reaches a certain point in the bottle due to its length. At first you're led to believe you have run out of product but in fact there's probably two whole month's worth of it still stuck to the sides of the bottle! I won't enjoy doing this eventually because I don't really want to damage my packaging because I paid for it. I think Urban Decay really need to sort that one out.


In the meantime you can find a great tutorial on how to de-pot your UDPP here:

Clumps of Mascara

I also actually e-mailed UD to complain about the packaging and they told me they were working on new packaging and appreciated my feedback but were unwilling to offer me any compensation for any product that went to waste because of their packaging. Think what you will of that.


Texture

Smooth, creamy texture. Blends over the eyelids beautifully. I read reviews that this was 'drying' but it isn't drying at all. It's so smooth and soft. I love the way it feels and goes on. I really wish they could make liquid eye shadows like this because it just goes on so wonderfully.


Scent

This product has no scent

Performance

As I stated above I wore this under my shadow during either a night out, long day at uni or my cheer/dance practices to REALLY test its power. When I am at practices I jump, dance and get really hot and sweaty.

What I found was it did prevent creasing but it didn't prevent fading when worn on its own without any kind of cream shadow over the top. That was disappointing. I would recommend wearing this and then applying a cream shadow over the top to give your shadow extra staying power. Otherwise you'll find your shadow will only last about 6 to 8 hours before it starts to fade. When worn with a cream shadow your eye shadow will last all day and at least half, if not all of the night! Mine went on all day and all night but it depends on your skin type as to how makeup will work on you.

So would I purchase this product again? If the packaging were better (say in a tube), I would definitely. It's awesome. Every eye shadow I had that would crease up on me no longer does. I love it and I wish I'd tried it sooner. I think I'll just wait until they re-design the packaging and make do until then. I really don't want the hassle of cutting up a bottle and de-potting product everytime I need a new bottle of this stuff.

My advice is not to buy it in department stores because they'll charge you the earth for it. Look on Ebay instead.

Quick And Easy Looks For School Or Work

Wednesday, November 12, 2008
Most of us don't have much time in the morning when applying make-up so I decided to just do some very easy looks for school/work in this entry. Basically we'll be working with mono (single) shadows. These are fast and simple and don't require you to spend time blending. These looks can all be done in about five or ten minutes.


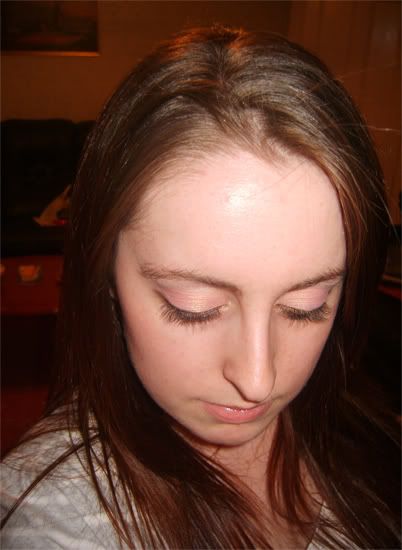
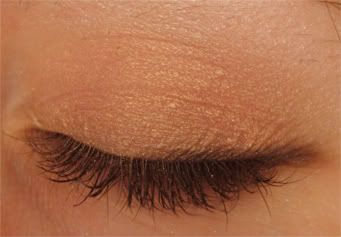
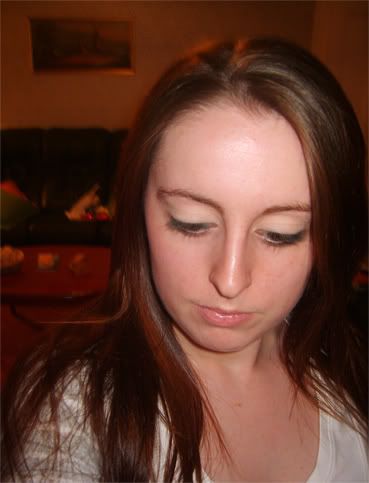
It's entirely up to you whether or not you want to wear foundation but a quick substitute would be pressed powder as this will even out your skin tone, prevent shine and it's quicker than foundation to apply when you have little time. Just sweep some over the areas of your face that you need it. Or you can use a tinted moisturiser. Obviously if you choose to wear foundation you should allow yourself more time. In all of these looks I am wearing liquid foundation (MAC Studio Fix in NW15) and blusher (No7 Mineral Blusher in 'Petal'). I used Urban Decay Primer Potion as my base. (See my upcoming review on this product to find out what it's like and how to use it.)

From The Base Up


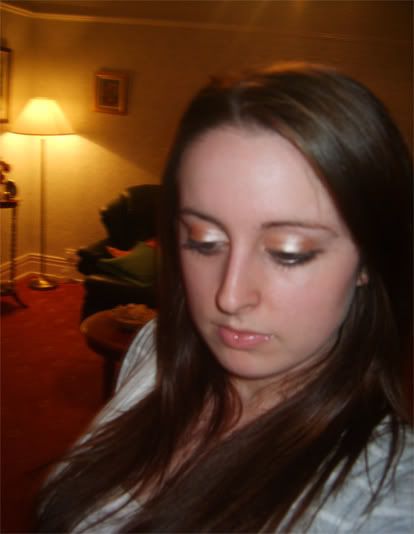
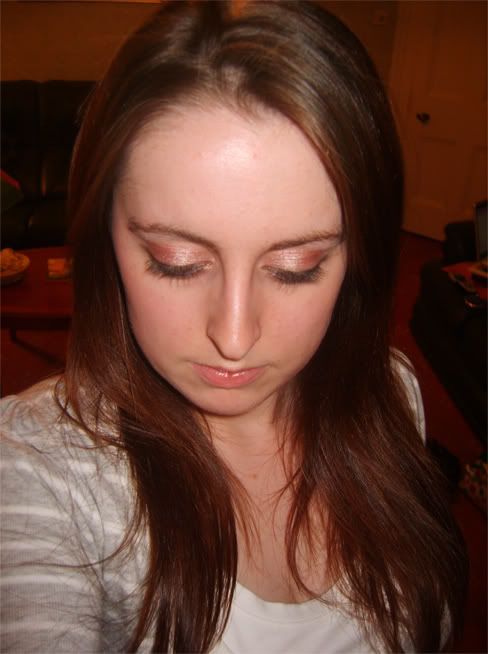
Apply a good base first. A base is either a creme shadow or eye primer that you apply to your lids before you put your eye shadow on. You can use any creme shadow or eye primer of your choice. A base gives your eye shadow something to stick to and this is important because it will stop your eye shadow fading, creasing or sliding off.

Apply Shadow


Next choose a shadow and pat it all over the lid with an eye shadow brush. Neutral colours work better for the day because they aren't overwhelming.

Colours I recommend for a daytime look include: taupe, light brown, peach, light mint green, lavender, baby pink, baby blue and ivory.

Line With Eye Shadow


If you think a shadow alone looks too 'flat' or 'one dimensional' on your eyes you could always take a plain black eye shadow and line half of the outer portion of your lids (go in between the lashes with the black shadow using a slanted liner brush to give the lashes a fuller appearence) and create a very thin 'wing' with the black shadow to give the shadow a bit of a kick. Using a dark shadow to line your eyes is much faster than using liquid liner and is much less harsh for the daytime. Take some shadow on your brush and pat it onto the lash line first before blending to make sure the colour shows up well.

Here's a few shadows I would wear in the day:


No7 Mono Shadow in 'Tender'


No7 Mono Shadow in 'Magnolia'


Bourjouis Liquid Shadow in 'Beige Metallique'


No17 Mono Shadow in 'Statuesque'


Natural Collection Mono Shadow in 'Milk Chocolate'


Finish by lining your waterlines with either a brown or black eye liner pencil and about two layers of mascara on the top lashes only. If you do choose to put mascara on your lower lashes I would suggest only going lightly. Too much will create a darker, heavier appearence that's more suited for night time.