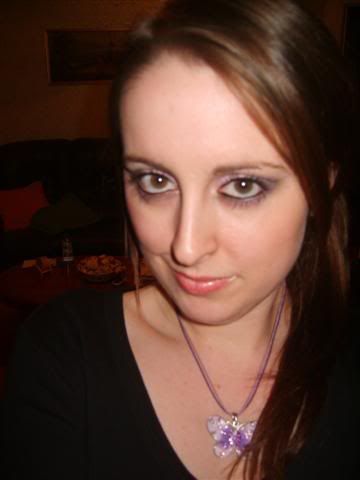
I wore something similar to this look to my cheer social party a week or so ago where we all dressed like ballerinas. I’ve been in love with it ever since so I thought I’d share it with all of you. (For my ballerina look I just played up the blusher big style to give that fresh/flushed look :D)
Before I begin also, I want to say sorry I haven’t updated sooner. I was swamped with essays and then uni started up and I’m now doing 2 channels on youtube!
My make up channel is kind of up and running. You can find it here: bluesparks24.
There’s only about 4 videos up at the moment and I do apologise for the bad lighting! I’m working on getting better lights but it’s difficult because I have no curtains or netting on my window so if I put lights on all over the place everybody can see into my room. :S I’m literally going to buy some netting for my window this weekend so hopefully I’ll have nice lighting by next week!
Okay, onward with the tutorial!
Products Used On:
Face: (Photos coming later today when I get more batteries for my camera. My camera eats batteries like crazy!)
MAC Studio Fix Foundation in NW15
MAC Satin Powder Blush in 'Dame'
Eyes:
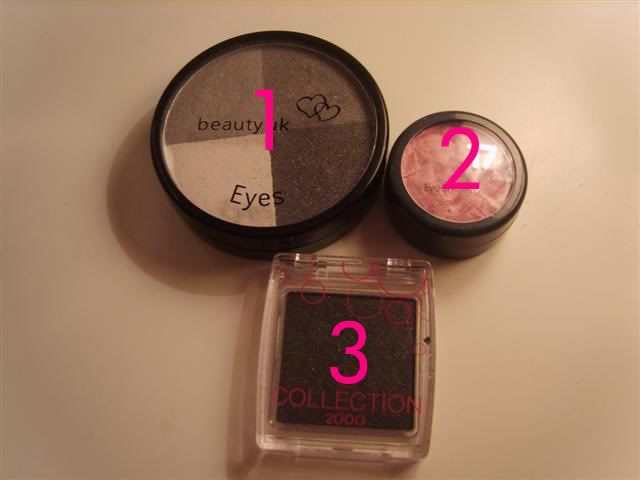
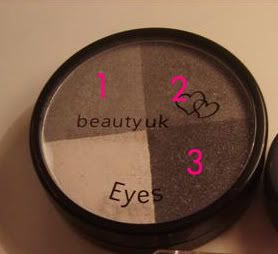
1. Beauty UK Quad in '9'
2. No17 Glitter Shadow in 'Heartbreaker'
3. Collection 2000 Intense Solo Shadow in '02 Charcoal Glitz'
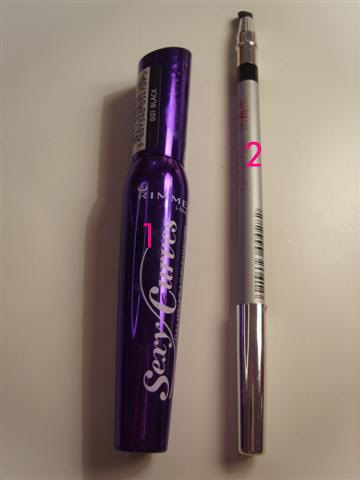
1. Rimmel Sexy Curves Mascara in '01 Black'
2. MeMeMe Eye Liner Pencil in 'Cleopatra'
Lips: (Photo coming soon for same reason above)
MAC Lip glass in 'Frozen Dream'
Brushes Used On Eyes/Brow bone:
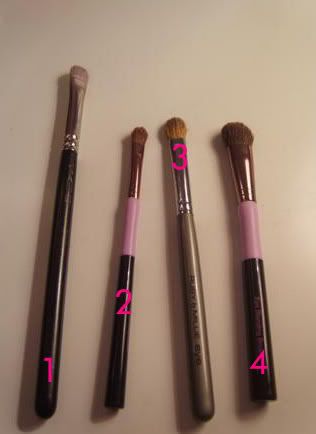
1. MAC 239 Eye Shadow Brush (Used to apply pink shadow)
2. Ms Make Up Small Compact Eye Shadow Brush (Used to apply all 3 silver shadows from BeautyUK palette)
3. Ruby and Millie Blending Brush (Used to blend out all three silver shadows)
4. Ms Make Up Eye Blending Brush (Used to apply highlighting shadow)
Brushes Used On Face (To apply blusher):
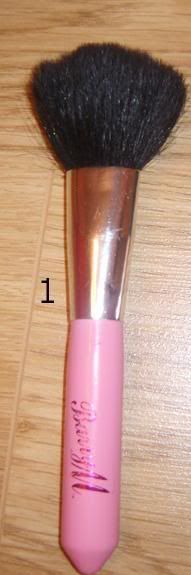
1. Barry M 3 in One Face Brush
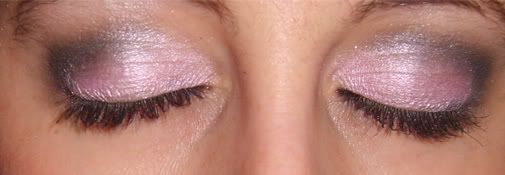
Instructional Picture:
Because we're using a quad I will be referring to each shadow by colour and number. I am only using 3 of the 4 shadows in the quad as the 4th is a highlighting shadow that I didn't use in this tutorial but you can feel free to use it if you want :)
You can see which shadow matches which number here: (So for example if I say shadow 1 it means the shadow with '1' on it in the photo):
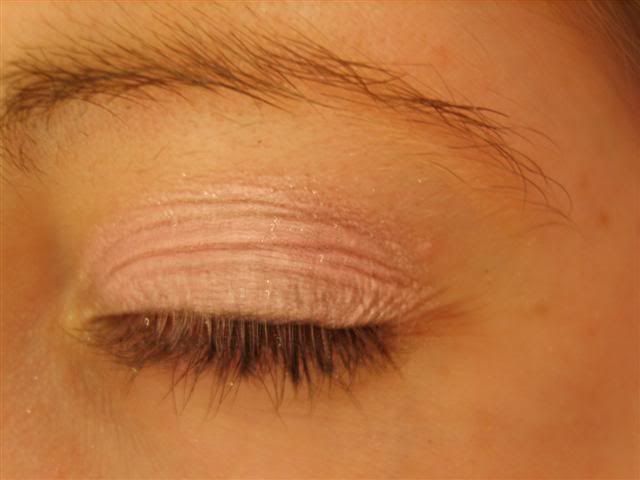
Begin by applying a good base to the eyelids. I used my Urban Decay Primer potion and then applied my Barry M Shimmering Eye/Lip pencil in ‘#5’ over the top. If you use a cream shadow as a base remember to smooth it out with your fingers so it doesn’t create lumps in your shadow.
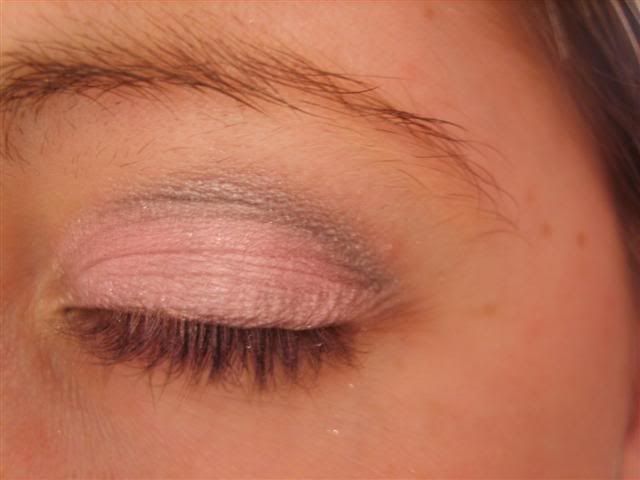
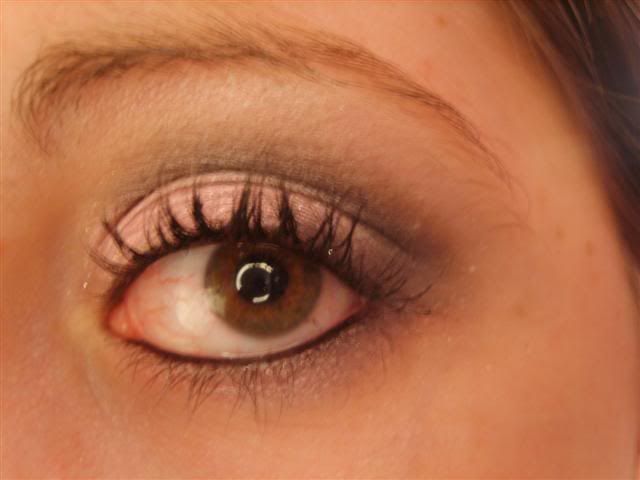
Take the pink shadow (in this case, No17 ‘Heartbreaker’) and apply to the entire lid.
Take the lightest grey from the Beauty UK (shadow '1') palette on a small compact eye shadow brush (it must be small for the definition we’re going for!) and work it into the crease. Stop half way and blend the edge into your inner corner. This will stop you from depositing too much colour in the inner area of your eye but will take the colour over to make it look nice and blended.
Take the medium silver (shadow '2') in the palette and blend into the crease in the same way with a small compact shadow brush.
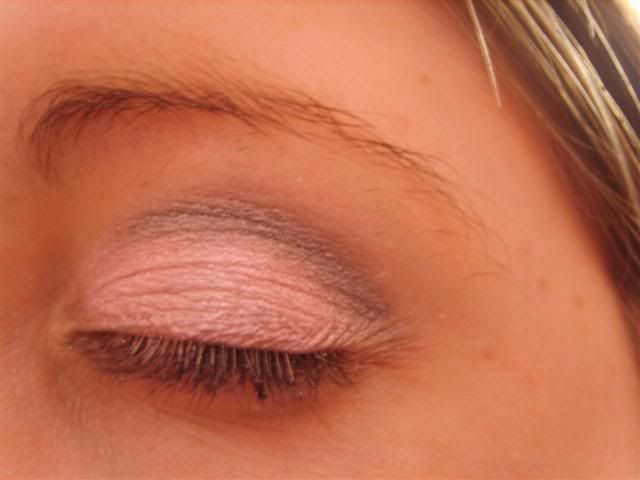
Next take the darkest grey (shadow '3') in the palette on the same small compact eye shadow blending brush and blend it over the light grey you just applied. Again, stop half way. Don't take this shadow all the way into the inner corner this time. This is because we want the shadow to appear darker in the outer corner/crease. (I hope you can see in the photo I left a little gap in the inner corner)
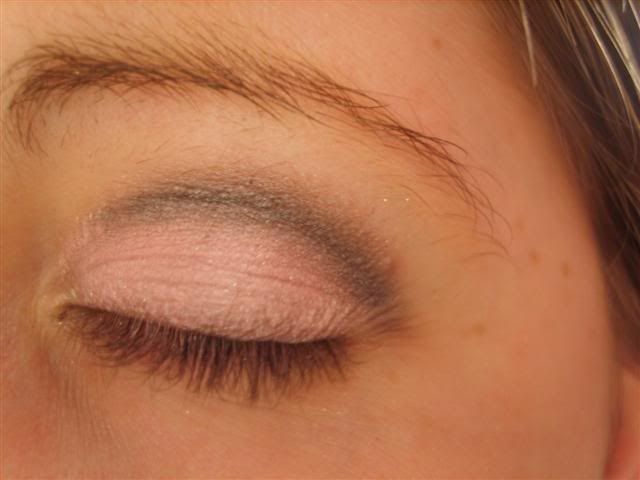
Dip your small compact brush into some black eye shadow and blend into the very outer corner of your eye. Look directly at your eye in the mirror and look at the outer corner. You want to take the shadow 1/3 of the way into your crease and about 1/3 of the way in along your upper lash line. Go as close to the upper lashes as possible. (A bit like you would when you’re lining them) The shadow should make a sideways ‘v’ shape on the outer edge of your eye. Take a little bit of shadow at a time because it’s easier to add than it is to subtract! Blend well. You can go over this with the lighter silver once more if you want to soften it up but the purpose of this step is to give definition. It's up to you how much you want.
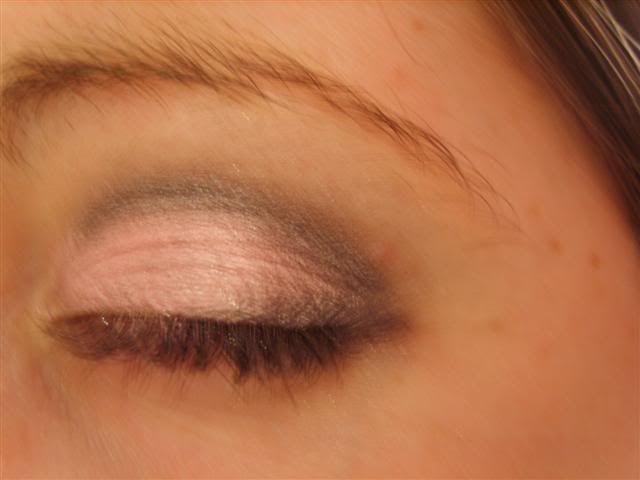
Because we have used some darker colours we now have a defined line in our crease that we want to soften up to create the smoked effect so take the lightest grey shadow from the BeautyUK palette on a fluffy eye blending brush and work it into the crease, stopping half way. Go over the dark grey and black and blend well. Take more light grey until you’re happy with the appearance of the shadow. Clean up the blended edges with a cotton bud and touch up the pink shadow if you need to.
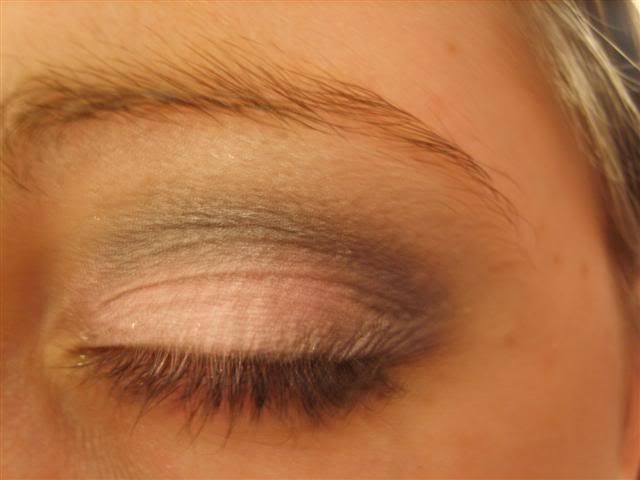
Highlight your brow bone with any highlighting shadow you have. Use a fluffy eye blending brush to sweep the colour over the brow bone and blend well. I used one that has a pink tone to it because I feel it works well with the colours in this look.
Line your waterlines with a black eye liner pencil and apply 2-3 coats of mascara.
Take some of the pink shadow and line the outer half of the lower lash line. I find it works best to apply a base of some sort under the lash line first and then apply the shadow on top. In this instance I used my Barry M pencil in #5 as it is pink and the colour works well underneath a pink shadow.
TIP: If you want to amp up this look for the night time skip the step where you would normally soften with a light grey shadow and just blend the dark grey and black into the outer corner with a fluffy brush instead. Line the top lash line with liquid liner (make the line thicker toward the outer edge and even wing it if you fancy!), then add some false eye lashes with volumising mascara to finish.
And you’re done! Yay.