Showing posts with label Face. Show all posts
Showing posts with label Face. Show all posts
Eyeliner: How To
Monday, June 30, 2008How To Choose An Eyeliner
There are many types of eyeliner available. So let's run through them all.
First is my favourite - Creme (or Gel) Eyeliner: This is eyeliner in a creamy/gel-like form and it usually comes in a pot. You apply it using an eyeliner brush. I love this kind of eyeliner personally because I find it has the most staying power out of all the kinds of eyeliner out there as well as perfect control. I can put on as much or as little as I need and create different looks with it. The colour is usually bolder with creme/gel eyeliners too. These can be used by beginners by all means but practice makes perfect with them so if you're just starting out you might want to consider the other kinds of eyeliners first.
Pencil Eyeliners: These are great for soft, smudged looks. Easy for beginners and offer good control. Keep them sharpened and you're good to go.
Liquid Eyeliner: Great for a sharp, crisp line. Come with their own applicator usually and are easy to apply. Again, like creme/gel liners, getting a good result with liquid liner takes practice.
Felt Tip Eyeliner: These are much like liquid liners except they come in felt tip form. Designed to give you the result of liquid liner with the control of a felt-tip pen. I personally can't stand them because I find most of them are too dry and take too much work to produce a simple line. However, I won't knock them completely as they are great for people starting out and I'm sure there are kinds that don't dry out as quickly.
How To Apply Eyeliner:
General rule of thumb when applying eyeliner is to NEVER STRETCH YOUR EYELID. This can cause premature sagging and wrinkles around the eye area and as soon as you allow the eyelid to relax your line will most likely appear wonky and uneven because the skin was taught when you applied it and relaxed when you're finished applying. Never drag, pull or tug your eyelids or lash lines.
If you have shakey hands then steady them by resting your hand on the side of your face. This offers much steadier control than simply resting your pinky on your cheek. Your whole hand is supported leaving your fingers able to draw the line properly.
If you're using creme/gel or liquid liner, start by dabbing it into the lash line and then build your line as thickly or thinly as you'd like.
With pencils it's a lot easier because you can simply line/smudge.
Keep cotton buds soaked in makeup remover close by to correct mistakes.
Mascara Application and Reviews
I dedicate this entry to my smoking hot and very lovely friend of mine- Lynnea.
Mascara Reviews (I'm going to use these in my future tutorials so you can see the results :)) Please forgive the presence of desk objects in some of the photos. I took these very late and night and I was too tired to edit them before uploading them. You can see the product in them anyway and that is what matters.
Barry M - Volumising, Lengthening and Curling Mascara. Can be purchased from http://www.barrym.com for £5.95 (approximately $11)

I love the texture and feel of this mascara. It has a very soft feel to it and it doesn't clump. There is a little scent but it is far from bothersome. The brush is different as it has tiny little bristles that stick out from all angles and go around the entire wand. This means it's especially easy to curl your lashes with it because you can basically place the wand at the base of your lashes and twist it against them and voila. Awesomely curled lashes. It can also be used to volumise as it is easily buildable.
Image Mascara £1 from my local Wilkinsons

Now I realise most people outside the UK won't have a Wilkinsons but I am doing the whole cheap mascara thing for a reason here. After using this particular mascara for a couple of months now I can honestly say my first review on it on my regular blog was right. I said that the texture was a little thin but soft and the wand was relatively thick and it didn't clump. It still doesn't clump and the product feels fresh even after the 6th or 7th time using it. Don't be afraid of buying cheaper mascara. A lot of more expensive mascaras are in some cases better but that doesn't mean the cheaper ones are no good at all. In fact this one is perfect for a natural daytime look. Not good for a night out because it didn't strike me as buildable but if you're looking to just swoop something on and go then try out something like this. It says it is volumising and it is to an extent but it's not dramatic enough for me personally. If you like your make up less dramatic then this would work for you.
Collection 2000 Maxi Curl Mascara approximately £3

Well it does what it says on the packaging. It gives me a wonderful curl in all honesty but not so good for a night out because it isn't very volumising. The brush tip is curved to help you get those very curled lashes and there is no scent or stickiness. A good priced mascara if you like your lashes curled and pretty. I love it.
Rimmel LashMAXXX Volumising Mascara (Non Waterproof but it does come in Waterproof) I got mine on offer for £5 from Superdrug but I believe it costs about £7 tops. You can buy it online almost anywhere but I would advise you to try Ebay because you'll likely find it much cheaper there :)

I LOVE THIS MASCARA!!! Fuck me it's effing awesome. Buildable and it gives you long spidery lashes like you wouldn't believe. (I'll do a tutorial using this to show you in the near future) It has a tiny comb on the end of the wand which seperates your lashes and gets rid of clumps. It isn't a curling mascara, it's more for that false lash effect. The texture is soft and there's no scent. I'd definitely buy this again, I love it.
One more thing - I've heard good reviews about Covergirl Lash Blast but I've never been able to find it here in the UK. Apparently it's fabulous but obviously that's from what I have heard and not my own experience. But I thought this might be useful for all the people outside of the UK :)
How to apply mascara
Start at the base of your lash and wiggle your brush (back and forth) upwards. (Note: wiggling your HEAD won't do anything to your mascara! Wiggle the BRUSH using your HAND. Sorry. I get peeved about people who do that...) Usually what I then do is apply long strokes upwards until my lashes are as long or thick appearing as I want. Wiggling your brush will only sort out clumps and it won't give your lashes length or curl them so it is best not to overdo that part of the application process. Tilt your head but not too far back. Going too far back will make you catch your wand with your eyelids because the more you go back the more the space between your lashes and lids closes. Tilt it a little and go slowly. If you make a mistake try to get a cotton bud on it right away. Some people might tell you to let it dry and it'll just crack off but personally if you press the cotton bud into the damp mascara it will absorb it and take most of it, if not all of it off right away and it saves you carrying a black smudge on your eye that you might forget about whilst waiting for it to dry. You can also look down whilst applying your mascara but I personally find this too hard to do because I don't feel I have the same control.
For your bottom lashes: Try and use the tip of a mascara wand that isn't too thick. All you need to do is touch your bottom lashes with the tip slightly. Drag it gently and if you like, smudge in between your lashes with a smudge brush (the minute you finish applying your mascara or it will dry and this won't work) for a soft effect. If you want to coat the entire bottom lashes and make sure you don't press too hard whilst you're combing them through. Go lightly or it'll smudge everywhere.
Mascara Reviews (I'm going to use these in my future tutorials so you can see the results :)) Please forgive the presence of desk objects in some of the photos. I took these very late and night and I was too tired to edit them before uploading them. You can see the product in them anyway and that is what matters.
Barry M - Volumising, Lengthening and Curling Mascara. Can be purchased from http://www.barrym.com for £5.95 (approximately $11)
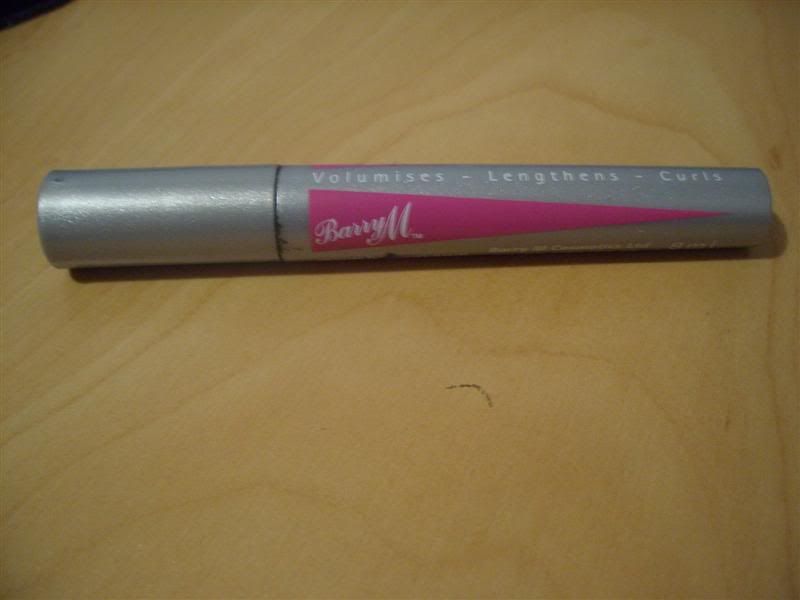
I love the texture and feel of this mascara. It has a very soft feel to it and it doesn't clump. There is a little scent but it is far from bothersome. The brush is different as it has tiny little bristles that stick out from all angles and go around the entire wand. This means it's especially easy to curl your lashes with it because you can basically place the wand at the base of your lashes and twist it against them and voila. Awesomely curled lashes. It can also be used to volumise as it is easily buildable.
Image Mascara £1 from my local Wilkinsons
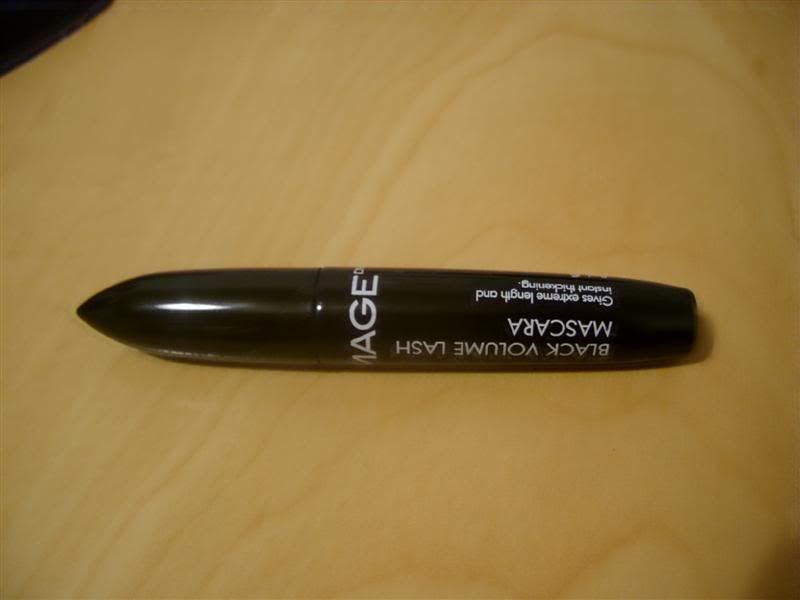
Now I realise most people outside the UK won't have a Wilkinsons but I am doing the whole cheap mascara thing for a reason here. After using this particular mascara for a couple of months now I can honestly say my first review on it on my regular blog was right. I said that the texture was a little thin but soft and the wand was relatively thick and it didn't clump. It still doesn't clump and the product feels fresh even after the 6th or 7th time using it. Don't be afraid of buying cheaper mascara. A lot of more expensive mascaras are in some cases better but that doesn't mean the cheaper ones are no good at all. In fact this one is perfect for a natural daytime look. Not good for a night out because it didn't strike me as buildable but if you're looking to just swoop something on and go then try out something like this. It says it is volumising and it is to an extent but it's not dramatic enough for me personally. If you like your make up less dramatic then this would work for you.
Collection 2000 Maxi Curl Mascara approximately £3
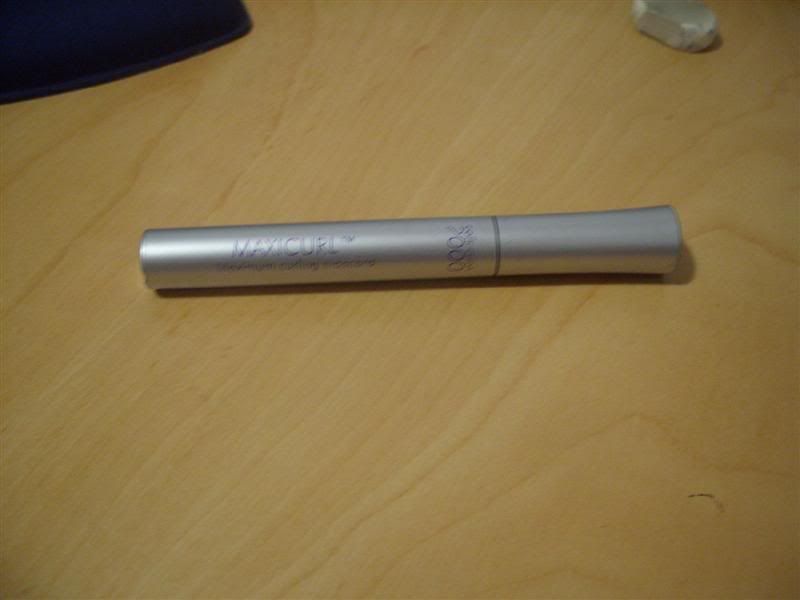
Well it does what it says on the packaging. It gives me a wonderful curl in all honesty but not so good for a night out because it isn't very volumising. The brush tip is curved to help you get those very curled lashes and there is no scent or stickiness. A good priced mascara if you like your lashes curled and pretty. I love it.
Rimmel LashMAXXX Volumising Mascara (Non Waterproof but it does come in Waterproof) I got mine on offer for £5 from Superdrug but I believe it costs about £7 tops. You can buy it online almost anywhere but I would advise you to try Ebay because you'll likely find it much cheaper there :)
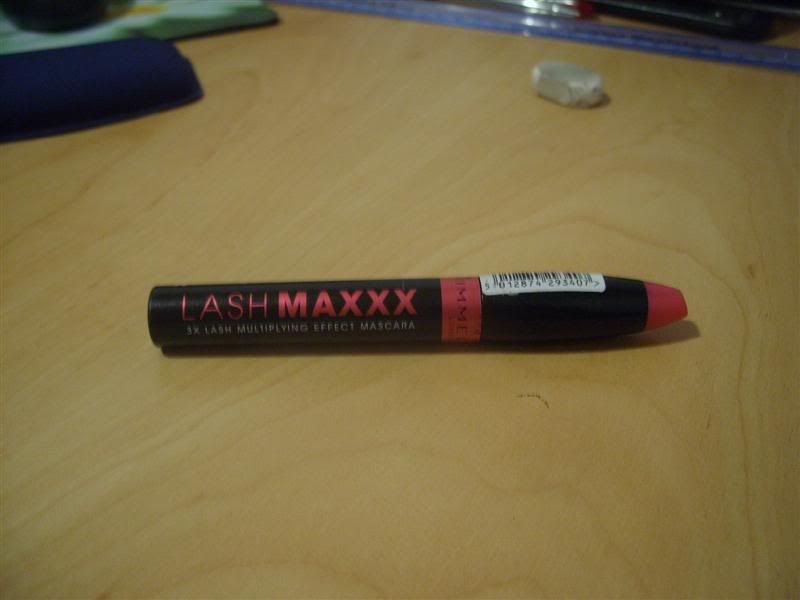
I LOVE THIS MASCARA!!! Fuck me it's effing awesome. Buildable and it gives you long spidery lashes like you wouldn't believe. (I'll do a tutorial using this to show you in the near future) It has a tiny comb on the end of the wand which seperates your lashes and gets rid of clumps. It isn't a curling mascara, it's more for that false lash effect. The texture is soft and there's no scent. I'd definitely buy this again, I love it.
One more thing - I've heard good reviews about Covergirl Lash Blast but I've never been able to find it here in the UK. Apparently it's fabulous but obviously that's from what I have heard and not my own experience. But I thought this might be useful for all the people outside of the UK :)
How to apply mascara
Start at the base of your lash and wiggle your brush (back and forth) upwards. (Note: wiggling your HEAD won't do anything to your mascara! Wiggle the BRUSH using your HAND. Sorry. I get peeved about people who do that...) Usually what I then do is apply long strokes upwards until my lashes are as long or thick appearing as I want. Wiggling your brush will only sort out clumps and it won't give your lashes length or curl them so it is best not to overdo that part of the application process. Tilt your head but not too far back. Going too far back will make you catch your wand with your eyelids because the more you go back the more the space between your lashes and lids closes. Tilt it a little and go slowly. If you make a mistake try to get a cotton bud on it right away. Some people might tell you to let it dry and it'll just crack off but personally if you press the cotton bud into the damp mascara it will absorb it and take most of it, if not all of it off right away and it saves you carrying a black smudge on your eye that you might forget about whilst waiting for it to dry. You can also look down whilst applying your mascara but I personally find this too hard to do because I don't feel I have the same control.
For your bottom lashes: Try and use the tip of a mascara wand that isn't too thick. All you need to do is touch your bottom lashes with the tip slightly. Drag it gently and if you like, smudge in between your lashes with a smudge brush (the minute you finish applying your mascara or it will dry and this won't work) for a soft effect. If you want to coat the entire bottom lashes and make sure you don't press too hard whilst you're combing them through. Go lightly or it'll smudge everywhere.
Lipstick and Lipgloss
Sunday, June 29, 2008Lipstick
Lipsticks come in many different formulas, depending on which brand you buy. When testing a lipstick it is best to use the tip of your index finger rather than the back of your hand as a lip colour will show up lighter on the back of your hand. The tip of your index finger is a closer shade to your lip colour too so you'll get a better idea of how pigmented that lip product really is.
Check the consistency of the product - Is it greasy? Dry? Does it slide easily? How well does the colour show up? All of these factors are important because if you have dry lips for example then you will need to ensure you wear a lipbalm with any lipstick that has a dryer formula.
Lip gloss
Apply many of the same rules for choosing a lipstick to choosing a lip gloss.
I find many drugstore lipglosses can be misleading. They often look very pigmented in the tube but in reality, a lot of them are quite sheer. If you like sheer colour then that's great but if you're like me and you are fond of your pigmentation then be aware of this.
Often testing lipglosses on your index finger will show its type of coverage up extremely well. I have been able to avoid lipglosses that were too sheer for my taste thanks to testing them this way.
Also check the formula. Is it sticky? Smooth? Creamy? Pigmented? Sheer?
And last but not least don't forget to check the scent of your lip products. It might sound silly but if you can't stand sickly lip products for example this will save you buying something you won't wear.
Highlighting Shadow / Illuminator
Friday, June 27, 2008Where to Apply Highlighter/Illuminator:
Eyes:
A highlighting shadow can work wonders when applied to the inner corners of the eyes. It can open the eye and make it look nice and fresh as well as bigger. Use a small, dense brush or a liner brush to apply your highlighting shadow here.
Brow Bone
Highlighter on the brow bones is wonderful for emphasising the arch of your brows and opening your eyes up. A fluffy brush is useful for covering the brow bone but you can also use a pencil brush if you want some good definition underneath the arch of your brows.
Cheeks:
Highlighter/Illuminator can also be applied to the face. Often the facial illuminators come in powdered or creme form.
Illuminator is useful if you want to give your face a fresh, dewy, pretty appearence. Apply to the tops of your cheek bones and over the temples for a fresh, glowing look.
Blush
When applying powdered or cream blush use a SMALL amount and BUILD up rather than using a huge amount at once. This is because adding blush is easy but taking away? Not so much!
Know your skin tone and work with it. Don't be afraid to experiment!
Blush is generally applied to the apples of the cheeks but can also be used to contour the cheek bones.
Blend in gentle circular or soft sweeping motions. If you are using mousse/creme blush then pick up the product on a clean finger, dab on with one finger and blend with another. This will help to avoid putting on too much colour at once and make blending easier.
Skin Care
Water
Everybody says this but honestly drinking water is the best way to keep your skin clear. Unless you have an exact condition that makes your skin break out no matter what then drinking lots of water is your best and cheapest way to clearer skin. Even if you do have a condition you should still drink water. It's so good for your skin and your body and I can't stress that enough.
I find it easier to get my water intake by drinking water with my meals. At the very least it helps your digestion doing it this way. But I have noticed a vast improvement in my skin since I started drinking more water. I used to suffer terrible blotchiness and blemishes everywhere and as soon as I incorporated water into my diet I saw SUCH an improvement. Now I get about two spots a month, if that. Your skin isn't against you but you have to work with it if you want to see results and drinking water for two weeks and expecting it to magically clear up is not being realistic. You have to keep drinking it on a regular basis.
Toners And Cleansers
Toners are used to clean impurities away from the face and some have added moisturisers. They are also known for their refreshing qualities.
Cleansers are used in much the same way. Except they can be used to remove makeup as well.
When looking for a toner or cleanser I would suggest you really know your skin first. What does it *really* need? Know its behaviour and pick one that will suit it.
Moisturisers
I will only occasionally use moisturiser on my face. (About three times a week) Water tends to work best for me when I want to hydrate my skin but I do think using a moisturiser is also important. Whichever skin type you have a moisturiser can certainly benefit you. Just be sure to pick one that suits your skin's behaviour. One with added SPF is a bonus.
Exfoliation
Exfoliating your skin is important. It removes the dead skin cells and rejuvinates your skin. This will in turn allow for better, smoother makeup application. TRUST ME!
You should exfoliate at least two or three times a week. If you have sensitive skin, try a gentle exfoliating scrub. (St Ives make a great one!)
Make Up Removers: Make up wipes, Baby oil, Baby wipes and Lotions
Firstly I can not stress enough how important it is to take your make up off at the end of the day. If you want to encourage the dirt and oils that have gathered on your skin during the day then by all means leave it on but don't cry to anyone else when your face is full of blemishes as a result. Look after your skin and do it a favour and take the crap off before bed. No matter how tired I am, I ALWAYS remove my make up before sleep. It's the law for me!
Foundation And Concealer
How To Pick A Good Foundation
To pick a good foundation firstly try to see the colour either on the back of your hand or your jawline in daylight. This is because shop lighting is artificial and you will not see the correct colour if you are looking under that sort of light.
The second way to tell is by spreading a reasonable amount from mid cheek to jaw. If the foundation disappears with a few strokes and it doesn't take too much effort to blend it into your skin then it's right for you. If it's not blending then it's not the right colour.
You can test foundation on the back of your hand if you can't get to daylight or don't want to test on your face. Take note of how it blends and what the formula feels like.
Applying Foundation
There are many methods you can use to apply your foundation. Using a foundation brush, a sponge or your hands. I use all three methods alternatively, depending on what type of foundation I am using. (For example, I would not use my fingers to apply pressed foundation because that would take too long and not give me adequate coverage).
I use my hands to apply my liquid foundation the most because I think your hands are your best tools. So long as you wash your hands beforehand or use a hand sanitizer (to avoid spreading bacteria around your face that can cause spots) you will be good to go.
However sponges are also great. Just be sure to dispose of them after two uses tops because bacteria spreads like wildfire on these things!
Concealer
Follow more or less the same rules for picking a concealer as you would with a foundation. Find one that suits your skin tone.
Concealers come in various colours nowadays depending on what you're looking to cover up. Salmon concealers for example are useful to cover eye bags whereas green ones reduce redness so are useful for covering spots.
Can be applied using a concealer brush or your (clean!) fingers. If using your hands, pat the concealer in and be careful not to tug your eye area too much. It is a delicate area and you may create wrinkles and sags if you are too rough with it.
If using a brush, use gentle, outward/upward motion to blend the concealer in and be sure to wash after every use, especially if you are using it to cover spots.
Subscribe to:
Posts (Atom)
 |
 |
 |
 |
 |
 |
 |
 |
 |
 |
 |
 |
 |
 |
 |


